I Built My Own Private Docker Registry with Zot and Backblaze B2
A practical guide to self-hosted Docker image hosting using Zot, Docker Compose, Backblaze B2, private access, RBAC, retention, audit logs, and GitHub Actions.
I use Docker images for personal projects, client deployments, and services running on my own servers. At some point, I wanted private Docker image hosting without tying every deployment to Docker Hub or GitHub Container Registry.
The standard name for this kind of service is a private Docker registry. It stores image layers and lets developers, CI systems, and servers push and pull images using normal Docker commands. Modern registries usually support the broader OCI standard too, which means they can store more than Docker images.
My requirements were simple:
- Private push and pull access
- A clean web interface
- Support for Docker and OCI images
- S3-compatible storage
- Separate access for CI and production servers
- Automatic cleanup of old tags
- GitHub Actions support
- A setup that fits in one Docker Compose project
I ended up using Zot, an open source OCI registry from the Linux Foundation ecosystem. In practical terms, it works as a self-hosted private Docker registry. It is small, works with normal Docker commands, includes a web interface, and supports S3-compatible storage such as Backblaze B2.
This guide shows the full setup. All names, domains, users, and bucket details are examples. Replace them with your own values.
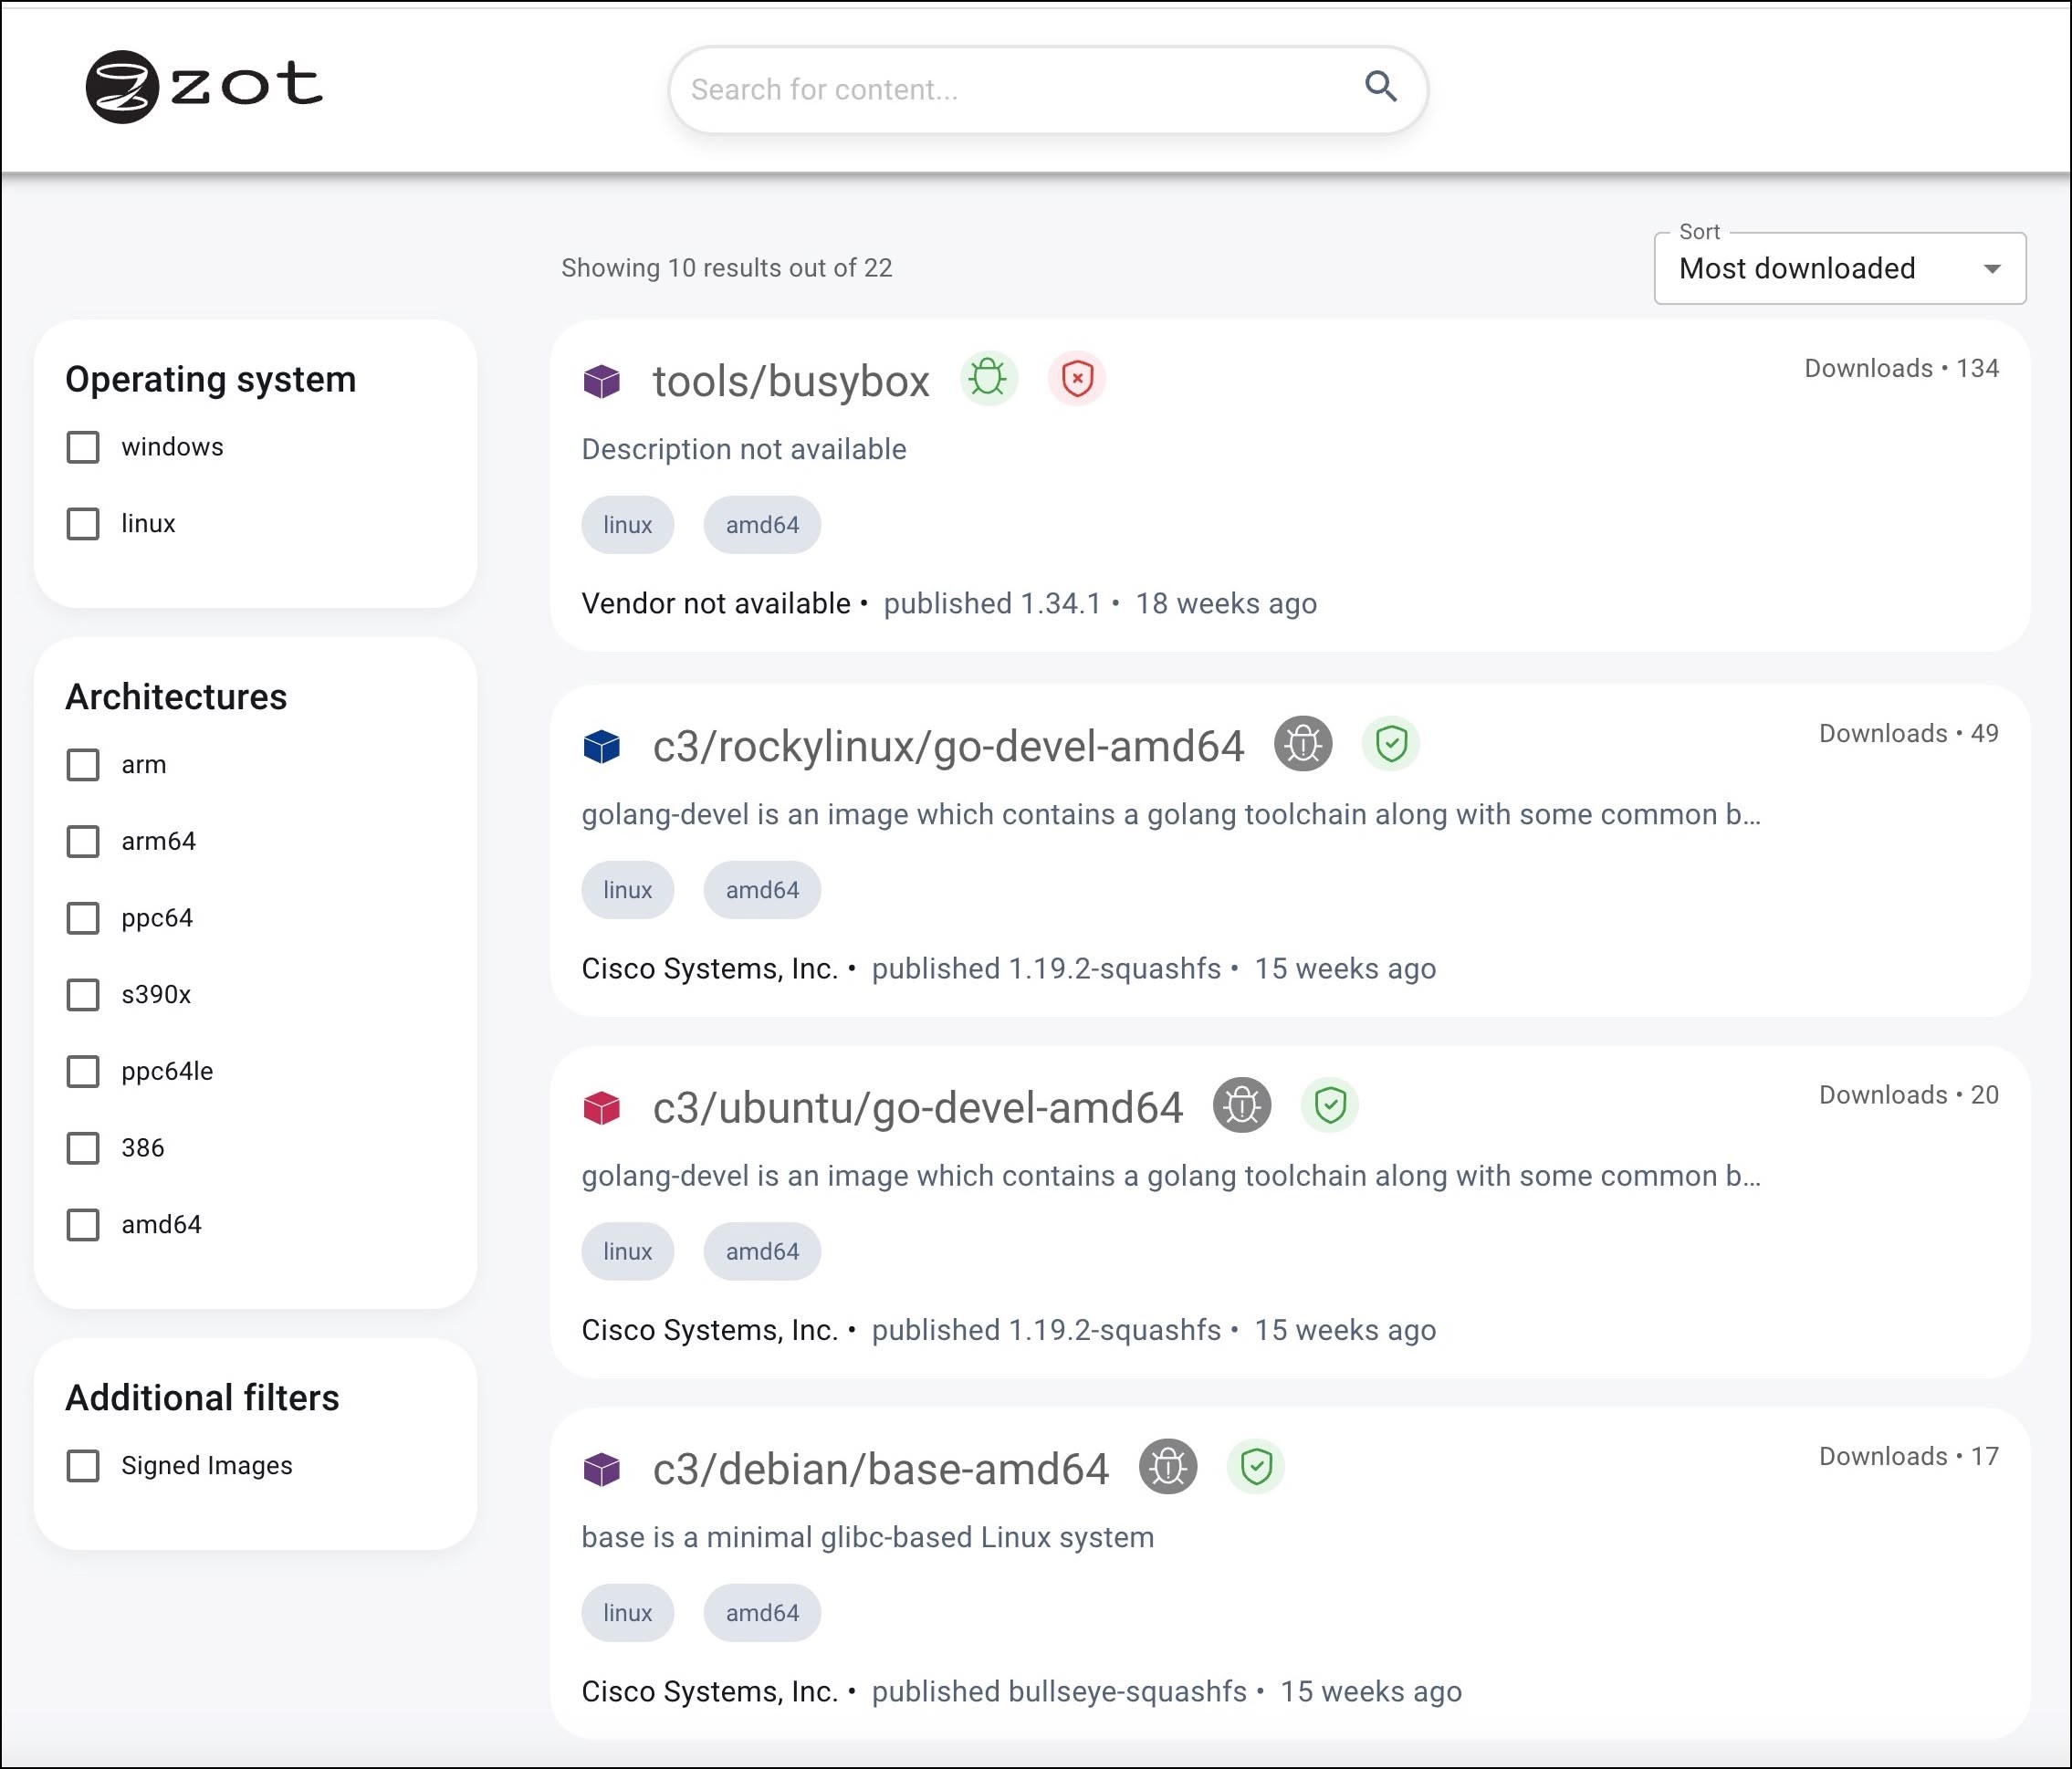
What we are building
We are building a private Docker image hosting stack that remains compatible with normal docker login, docker push, and docker pull commands. The final setup looks like this:
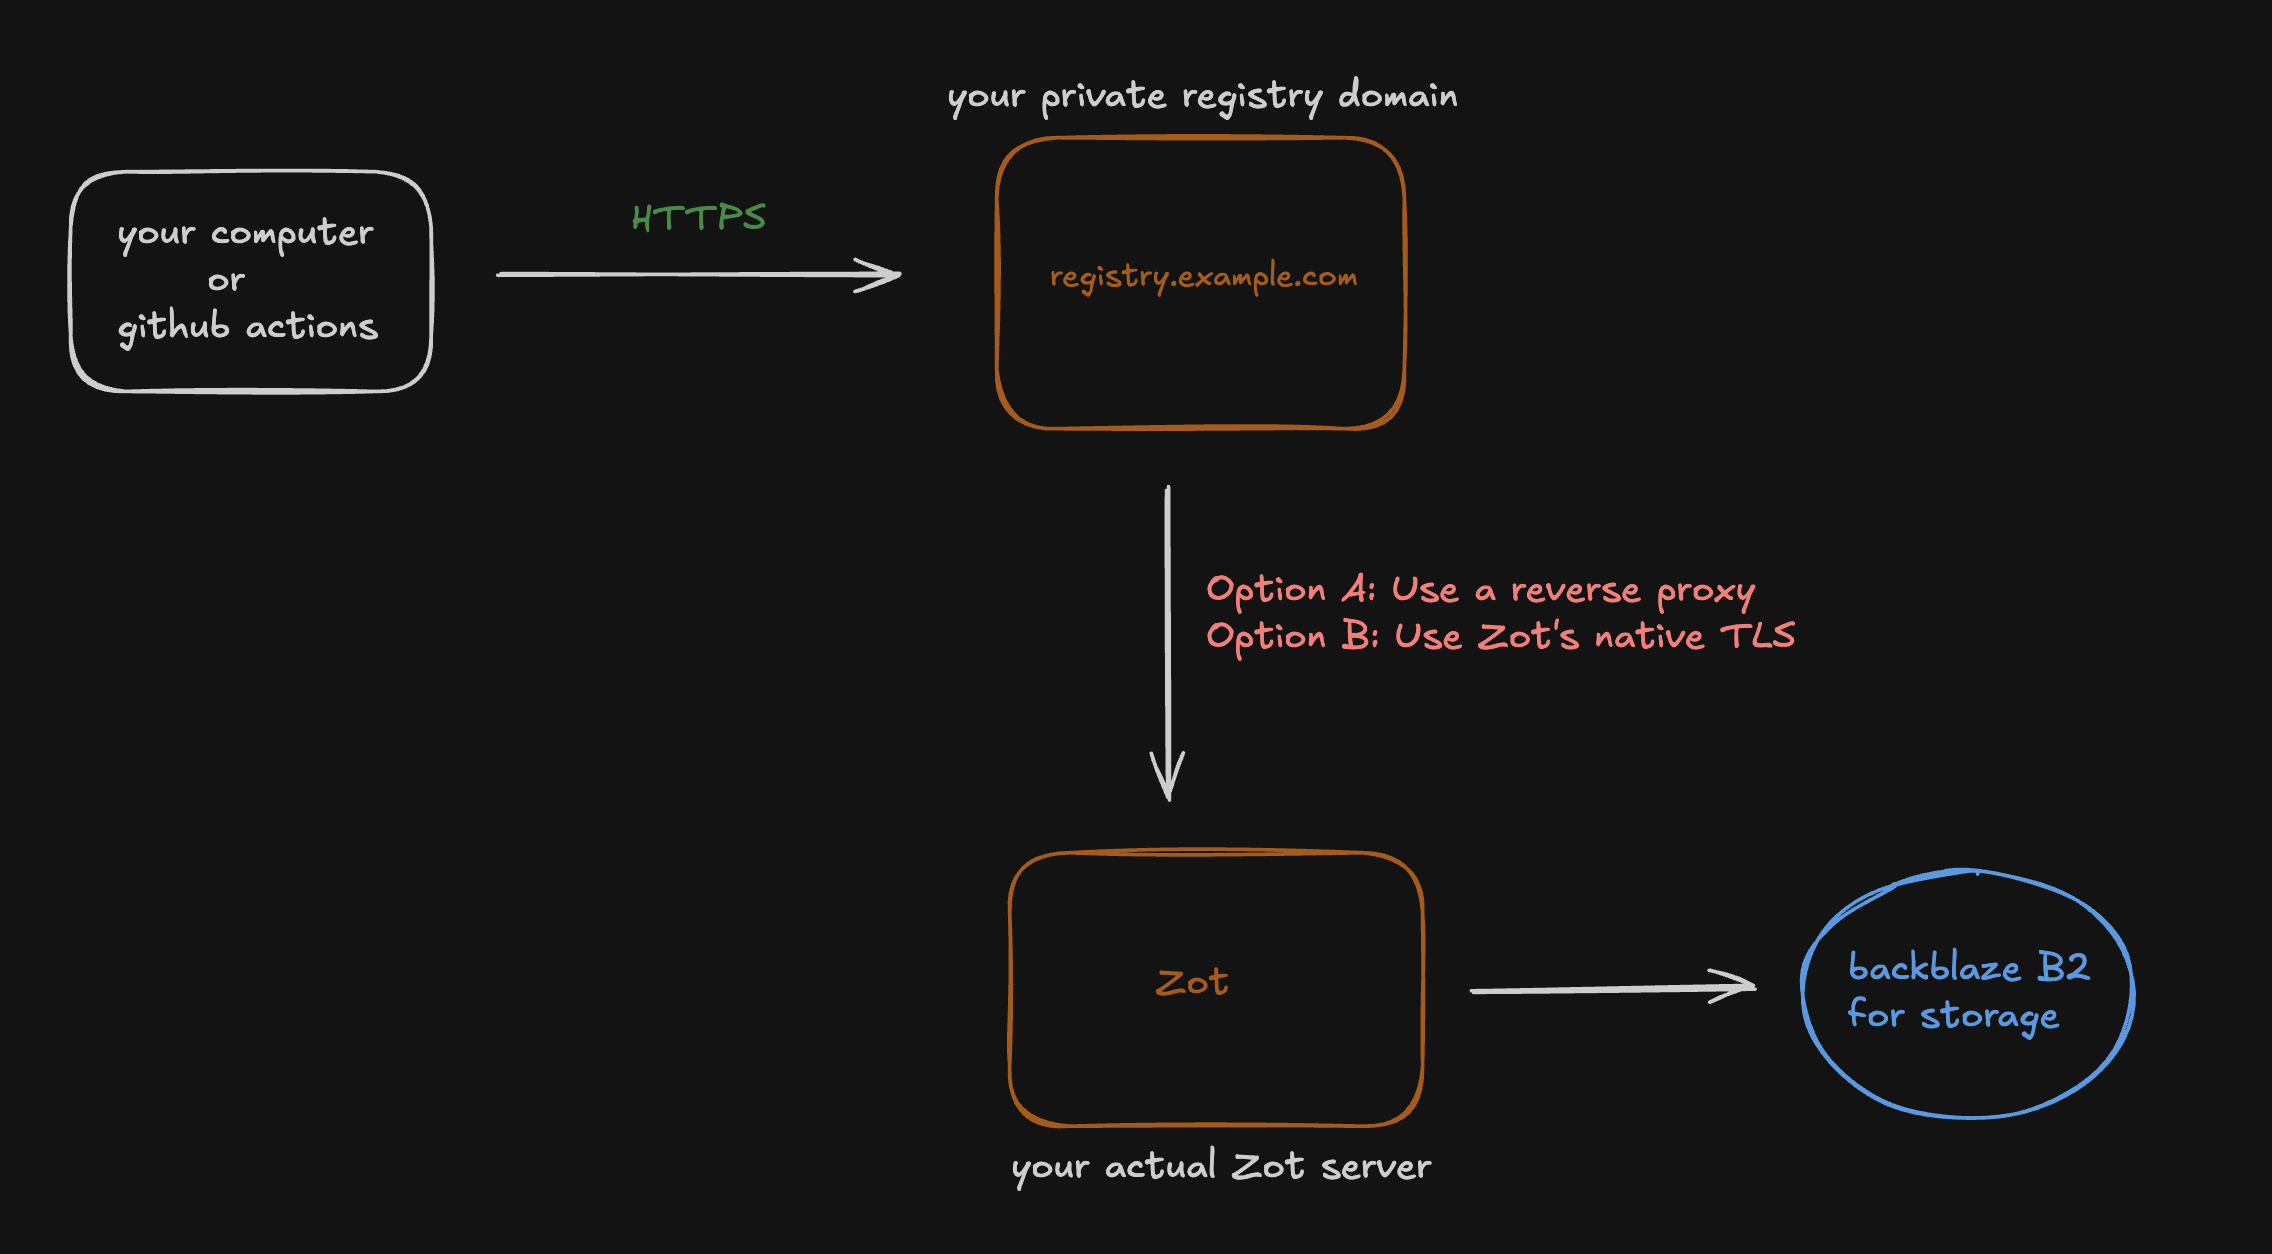
A reverse proxy such as Caddy, Traefik, or Nginx is optional. Zot can serve HTTPS directly when you mount a certificate and private key into the container. I use a reverse proxy in the main Compose example because it makes certificate management and routing easier when the server already hosts other applications.
Zot handles authentication, authorization, repository metadata, the web interface, retention, audit logging, and registry operations. Backblaze B2 stores the image data through its S3-compatible API.
The production server gets a read-only account. GitHub Actions gets a separate account that can push images. An admin account can manage every repository.
Why Zot
There are several good options for self-hosting a private Docker registry.
The official CNCF Distribution registry is very small, but it does not include a web interface or simple repository-level user management. Harbor has strong team and security features, but it brings several services and needs more memory and maintenance.
Zot sits between them. It is technically an OCI container registry, but it works as a Docker registry for the workflow in this guide. It supports:
- The OCI Distribution Specification
- Docker push and pull
- A built-in web interface
htpasswd, LDAP, bearer tokens, OIDC, and other authentication methods- Repository-level access control
- S3-compatible object storage
- Garbage collection and retention rules
- Audit logs and Prometheus metrics
- Registry scrubbing
- API keys
- OCI artifacts such as Helm charts, signatures, attestations, and SBOMs
- Registry mirroring and synchronization
This guide uses Zot v2.1.18. Check the Zot releases page before deploying and update the pinned version when you are ready.
What you need
Before starting, you need:
- A Linux server with Docker and Docker Compose
- A domain or subdomain such as
registry.example.com - A valid TLS certificate, served either by Zot itself or by an optional reverse proxy
- A private Backblaze B2 bucket
- A Backblaze application key restricted to that bucket
- GitHub repository access if you plan to use GitHub Actions
Note: You can use any other S3-compatible storage instead of Backblaze B2. Zot supports AWS S3, MinIO, Wasabi, DigitalOcean Spaces, and other providers. The configuration is similar, but the endpoint and region values will differ.
Docker expects HTTPS for a remote registry. You can configure insecure registries for local testing, but that should not be the normal production setup. Caddy and Traefik are not required. They are simply convenient ways to terminate TLS and route traffic to Zot.
1. Create the project directory
mkdir -p ~/services/zot/{auth,logs}
cd ~/services/zotThe main example uses a reverse proxy, so it creates a shared Docker network:
docker network inspect proxy >/dev/null 2>&1 || \
docker network create proxySkip this network when serving HTTPS directly from Zot. The direct TLS option is shown later in the guide.
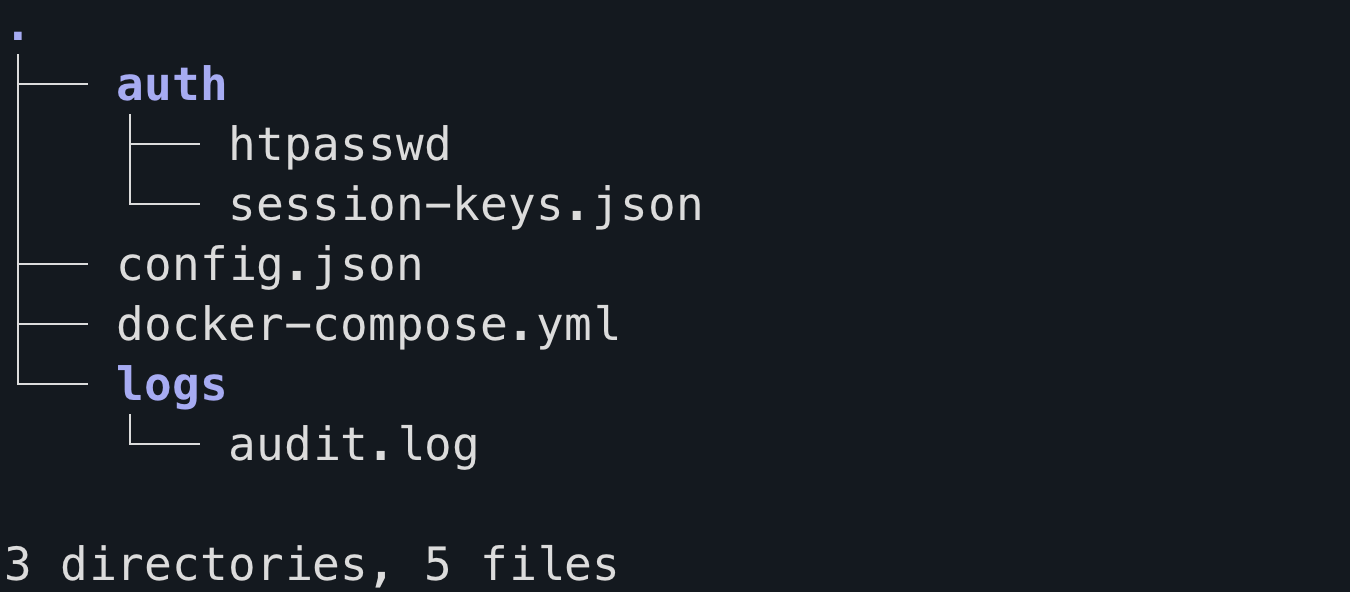
The directory will look like this when we finish:
2. Create a private Backblaze B2 bucket
Open the Backblaze console and create a private bucket. For this guide, I will use:
my-private-registryThen create a new application key with access restricted to that bucket. The key needs enough access to list the bucket and read, write, and delete objects. Delete access is needed when Zot removes old registry data.
Save these values:
Key ID
Application Key
S3 endpoint
Region
Bucket nameA Backblaze S3 endpoint looks like this:
https://s3.us-east-005.backblazeb2.comThe region in this example is:
us-east-005Use a dedicated application key instead of your main Backblaze account key.
3. Create the Docker Compose file
Create docker-compose.yml:
services:
  zot:
    image: ghcr.io/project-zot/zot:v2.1.18
    container_name: zot
    restart: unless-stopped
    init: true

    command:
      - serve
      - /etc/zot/config.json

    env_file:
      - .env

    volumes:
      - ./config.json:/etc/zot/config.json:ro
      - ./auth/htpasswd:/etc/zot/htpasswd:ro
      - ./auth/session-keys.json:/etc/zot/session-keys.json:ro
      - ./logs:/var/log/zot
      - zot_data:/var/lib/registry

    expose:
      - "5000"

    networks:
      - proxy

    security_opt:
      - no-new-privileges:true

    stop_grace_period: 30s

    logging:
      driver: json-file
      options:
        max-size: "10m"
        max-file: "5"

volumes:
  zot_data:

networks:
  proxy:
external: trueThere is no published host port in this version because the main example uses a reverse proxy. The proxy reaches Zot through the shared Docker network at zot:5000.
This is not a Zot requirement. When using Zot's native TLS support, publish the registry port directly and mount your certificate files instead. That variant is shown in the HTTPS section below.
The named volume remains useful for Zot's local working data. The image content itself is stored in Backblaze B2 through the S3 storage driver.
4. Store the Backblaze credentials
Create .env:
AWS_ACCESS_KEY_ID=REPLACE_WITH_BACKBLAZE_KEY_ID
AWS_SECRET_ACCESS_KEY=REPLACE_WITH_BACKBLAZE_APPLICATION_KEYProtect it:
chmod 600 .envZot can read S3 credentials from the standard AWS_ACCESS_KEY_ID and AWS_SECRET_ACCESS_KEY environment variables. This keeps the credentials out of config.json.
Do not commit .env, auth/, or logs/ to Git.
A simple .gitignore is enough:
.env
auth/
logs/5. Create registry users
I use three accounts:
| User | Purpose | Access |
|---|---|---|
admin | Human administration | Full access |
github-ci | GitHub Actions | Push and pull all repositories |
app-server | Production server | Pull one repository only |
Create the first user and a new password file:
docker run --rm -it \
  --user "$(id -u):$(id -g)" \
  -v "$PWD/auth:/auth" \
  --entrypoint htpasswd \
  httpd:2.4-alpine \
-B -c /auth/htpasswd adminEnter a new registry password when prompted. Nothing appears while you type. That is normal.
Add the CI user:
docker run --rm -it \
  --user "$(id -u):$(id -g)" \
  -v "$PWD/auth:/auth" \
  --entrypoint htpasswd \
  httpd:2.4-alpine \
-B /auth/htpasswd github-ciAdd the production server user:
docker run --rm -it \
  --user "$(id -u):$(id -g)" \
  -v "$PWD/auth:/auth" \
  --entrypoint htpasswd \
  httpd:2.4-alpine \
-B /auth/htpasswd app-serverUse -c only for the first user. Using it again replaces the file and removes the existing users.
Verify the usernames:
cut -d: -f1 auth/htpasswdExpected output:
admin
github-ci
app-serverThe file should contain bcrypt hashes, not plain passwords.
6. Create persistent session keys
The browser interface uses session keys. Generate them once so login sessions remain valid after a restart:
HASH_KEY="$(openssl rand -hex 32)"
ENCRYPT_KEY="$(openssl rand -hex 16)"

printf '{\n  "hashKey": "%s",\n  "encryptKey": "%s"\n}\n' \
  "$HASH_KEY" \
  "$ENCRYPT_KEY" \
  > auth/session-keys.json

chmod 600 auth/session-keys.jsonDo not regenerate this file during every deployment.
7. Create the Zot configuration
Create config.json:
{
  "distSpecVersion": "1.1.1",
  "storage": {
    "rootDirectory": "/var/lib/registry",
    "dedupe": false,
    "gc": true,
    "gcDelay": "1h",
    "gcInterval": "24h",
    "redirectBlobURL": true,
    "retention": {
      "dryRun": true,
      "delay": "24h",
      "policies": [
        {
          "repositories": ["**"],
          "deleteReferrers": true,
          "deleteUntagged": true,
          "keepTags": [
            {
              "patterns": [".*"],
              "mostRecentlyPushedCount": 10
            }
          ]
        }
      ]
    },
    "storageDriver": {
      "name": "s3",
      "rootdirectory": "/zot",
      "region": "us-east-005",
      "regionendpoint": "https://s3.us-east-005.backblazeb2.com",
      "bucket": "my-private-registry",
      "forcepathstyle": true,
      "secure": true,
      "skipverify": false,
      "v4auth": true
    }
  },
  "http": {
    "address": "0.0.0.0",
    "port": "5000",
    "externalUrl": "https://registry.example.com",
    "realm": "zot",
    "readTimeout": "5m",
    "writeTimeout": "5m",
    "compat": ["docker2s2"],
    "auth": {
      "htpasswd": {
        "path": "/etc/zot/htpasswd"
      },
      "failDelay": 3,
      "apikey": true,
      "sessionKeysFile": "/etc/zot/session-keys.json"
    },
    "accessControl": {
      "repositories": {
        "**": {
          "policies": [
            {
              "users": ["github-ci"],
              "actions": ["read", "create", "update"]
            }
          ]
        },
        "apps/my-app": {
          "policies": [
            {
              "users": ["app-server"],
              "actions": ["read"]
            },
            {
              "users": ["github-ci"],
              "actions": ["read", "create", "update"]
            }
          ]
        }
      },
      "adminPolicy": {
        "users": ["admin"],
        "actions": ["read", "create", "update", "delete"]
      }
    }
  },
  "log": {
    "level": "info",
    "audit": "/var/log/zot/audit.log"
  },
  "extensions": {
    "search": {
      "enable": true
    },
    "ui": {
      "enable": true
    },
    "scrub": {
      "enable": true,
      "interval": "24h"
    }
  }
}Replace these values:
us-east-005
https://s3.us-east-005.backblazeb2.com
my-private-registry
https://registry.example.com
apps/my-appWhy deduplication is disabled
Zot can deduplicate blobs across repositories. With remote storage, that feature needs a supported remote cache such as Redis or DynamoDB. A small single-node setup does not need the extra service, so this guide uses:
"dedupe": falseDocker layers are still stored and pulled normally.
How the RBAC rules work
The configuration gives:
adminfull access to every repositorygithub-ciread, create, and update access to every repositoryapp-serverread-only access toapps/my-app- No repository access for other authenticated users unless a policy grants it
The more specific apps/my-app policy also repeats github-ci. Zot uses the most specific matching repository rule, so the CI user must be included there as well.
RBAC works at the repository level. It does not restrict a user to one tag inside a repository. A user with read access to apps/my-app can pull every tag and digest in that repository.
How retention works
This rule keeps the 10 most recently pushed tags for each repository:
"mostRecentlyPushedCount": 10The count is applied separately per repository. Ten tags in one repository do not affect another repository.
A tag such as latest counts as one tag. If latest and a commit SHA point to the same image digest, they still count as two tags for retention purposes.
The first deployment uses:
"dryRun": trueZot will log what it plans to remove without removing the tags. After checking the logs, change it to false to activate cleanup.
Why CVE scanning is not enabled here
Zot includes a Trivy-based CVE scanning extension, but Zot documents that scanning as unsupported for cloud storage and scale-out deployments. Backblaze B2 is remote cloud storage, so enabling the built-in scanner causes configuration validation to fail.
I scan images in GitHub Actions instead. I cover that later in the guide.
8. Validate the configuration
Before starting Zot, run its built-in configuration check:
docker compose run --rm zot verify /etc/zot/config.jsonA successful check should finish without an invalid server config error.
Start the registry:
docker compose up -dCheck the logs:
docker compose logs --tail=100 zotCheck the container:
docker compose ps9. Choose how Zot serves HTTPS
A reverse proxy is optional. Pick one of the following approaches.
Option A: Use Caddy, Traefik, Nginx, or another reverse proxy
This is convenient when the server already hosts other services or when you want the proxy to manage certificates.
With Caddy, the route can be as small as this:
registry.example.com {
    reverse_proxy zot:5000
}Caddy and Zot must share the proxy Docker network.
Reload Caddy after changing its configuration. The exact command depends on how you deployed it.
For Traefik, add the matching router and service labels to the Zot container or configure a file provider route to http://zot:5000.
Option B: Serve HTTPS directly from Zot
Zot supports native TLS. In this setup, Zot listens inside the container and Docker publishes it directly on port 443.
Create a certificate directory:
mkdir -p certsPlace your certificate and private key there:
certs/fullchain.pem
certs/privkey.pemAdd these mounts to the Zot service:
volumes:
  - ./certs/fullchain.pem:/etc/zot/certs/fullchain.pem:ro
- ./certs/privkey.pem:/etc/zot/certs/privkey.pem:roReplace expose with a published port:
ports:
- "443:5000"Then add the TLS block inside the existing http object in config.json:
"tls": {
  "cert": "/etc/zot/certs/fullchain.pem",
  "key": "/etc/zot/certs/privkey.pem"
}You are responsible for issuing and renewing the certificate in this mode. A reverse proxy is often easier because tools such as Caddy can automate that work, but Zot does not require one.
Do not expose the registry through plain HTTP on the public internet. Also check whether any CDN or tunnel in front of it has request body limits, because large image layers can fail during pushes.
10. Test the registry
An unauthenticated request should return 401 Unauthorized:
curl -i https://registry.example.com/v2/Test your admin account:
curl -i -u admin https://registry.example.com/v2/Enter the password when prompted. A successful response should return 200 and an empty JSON object:
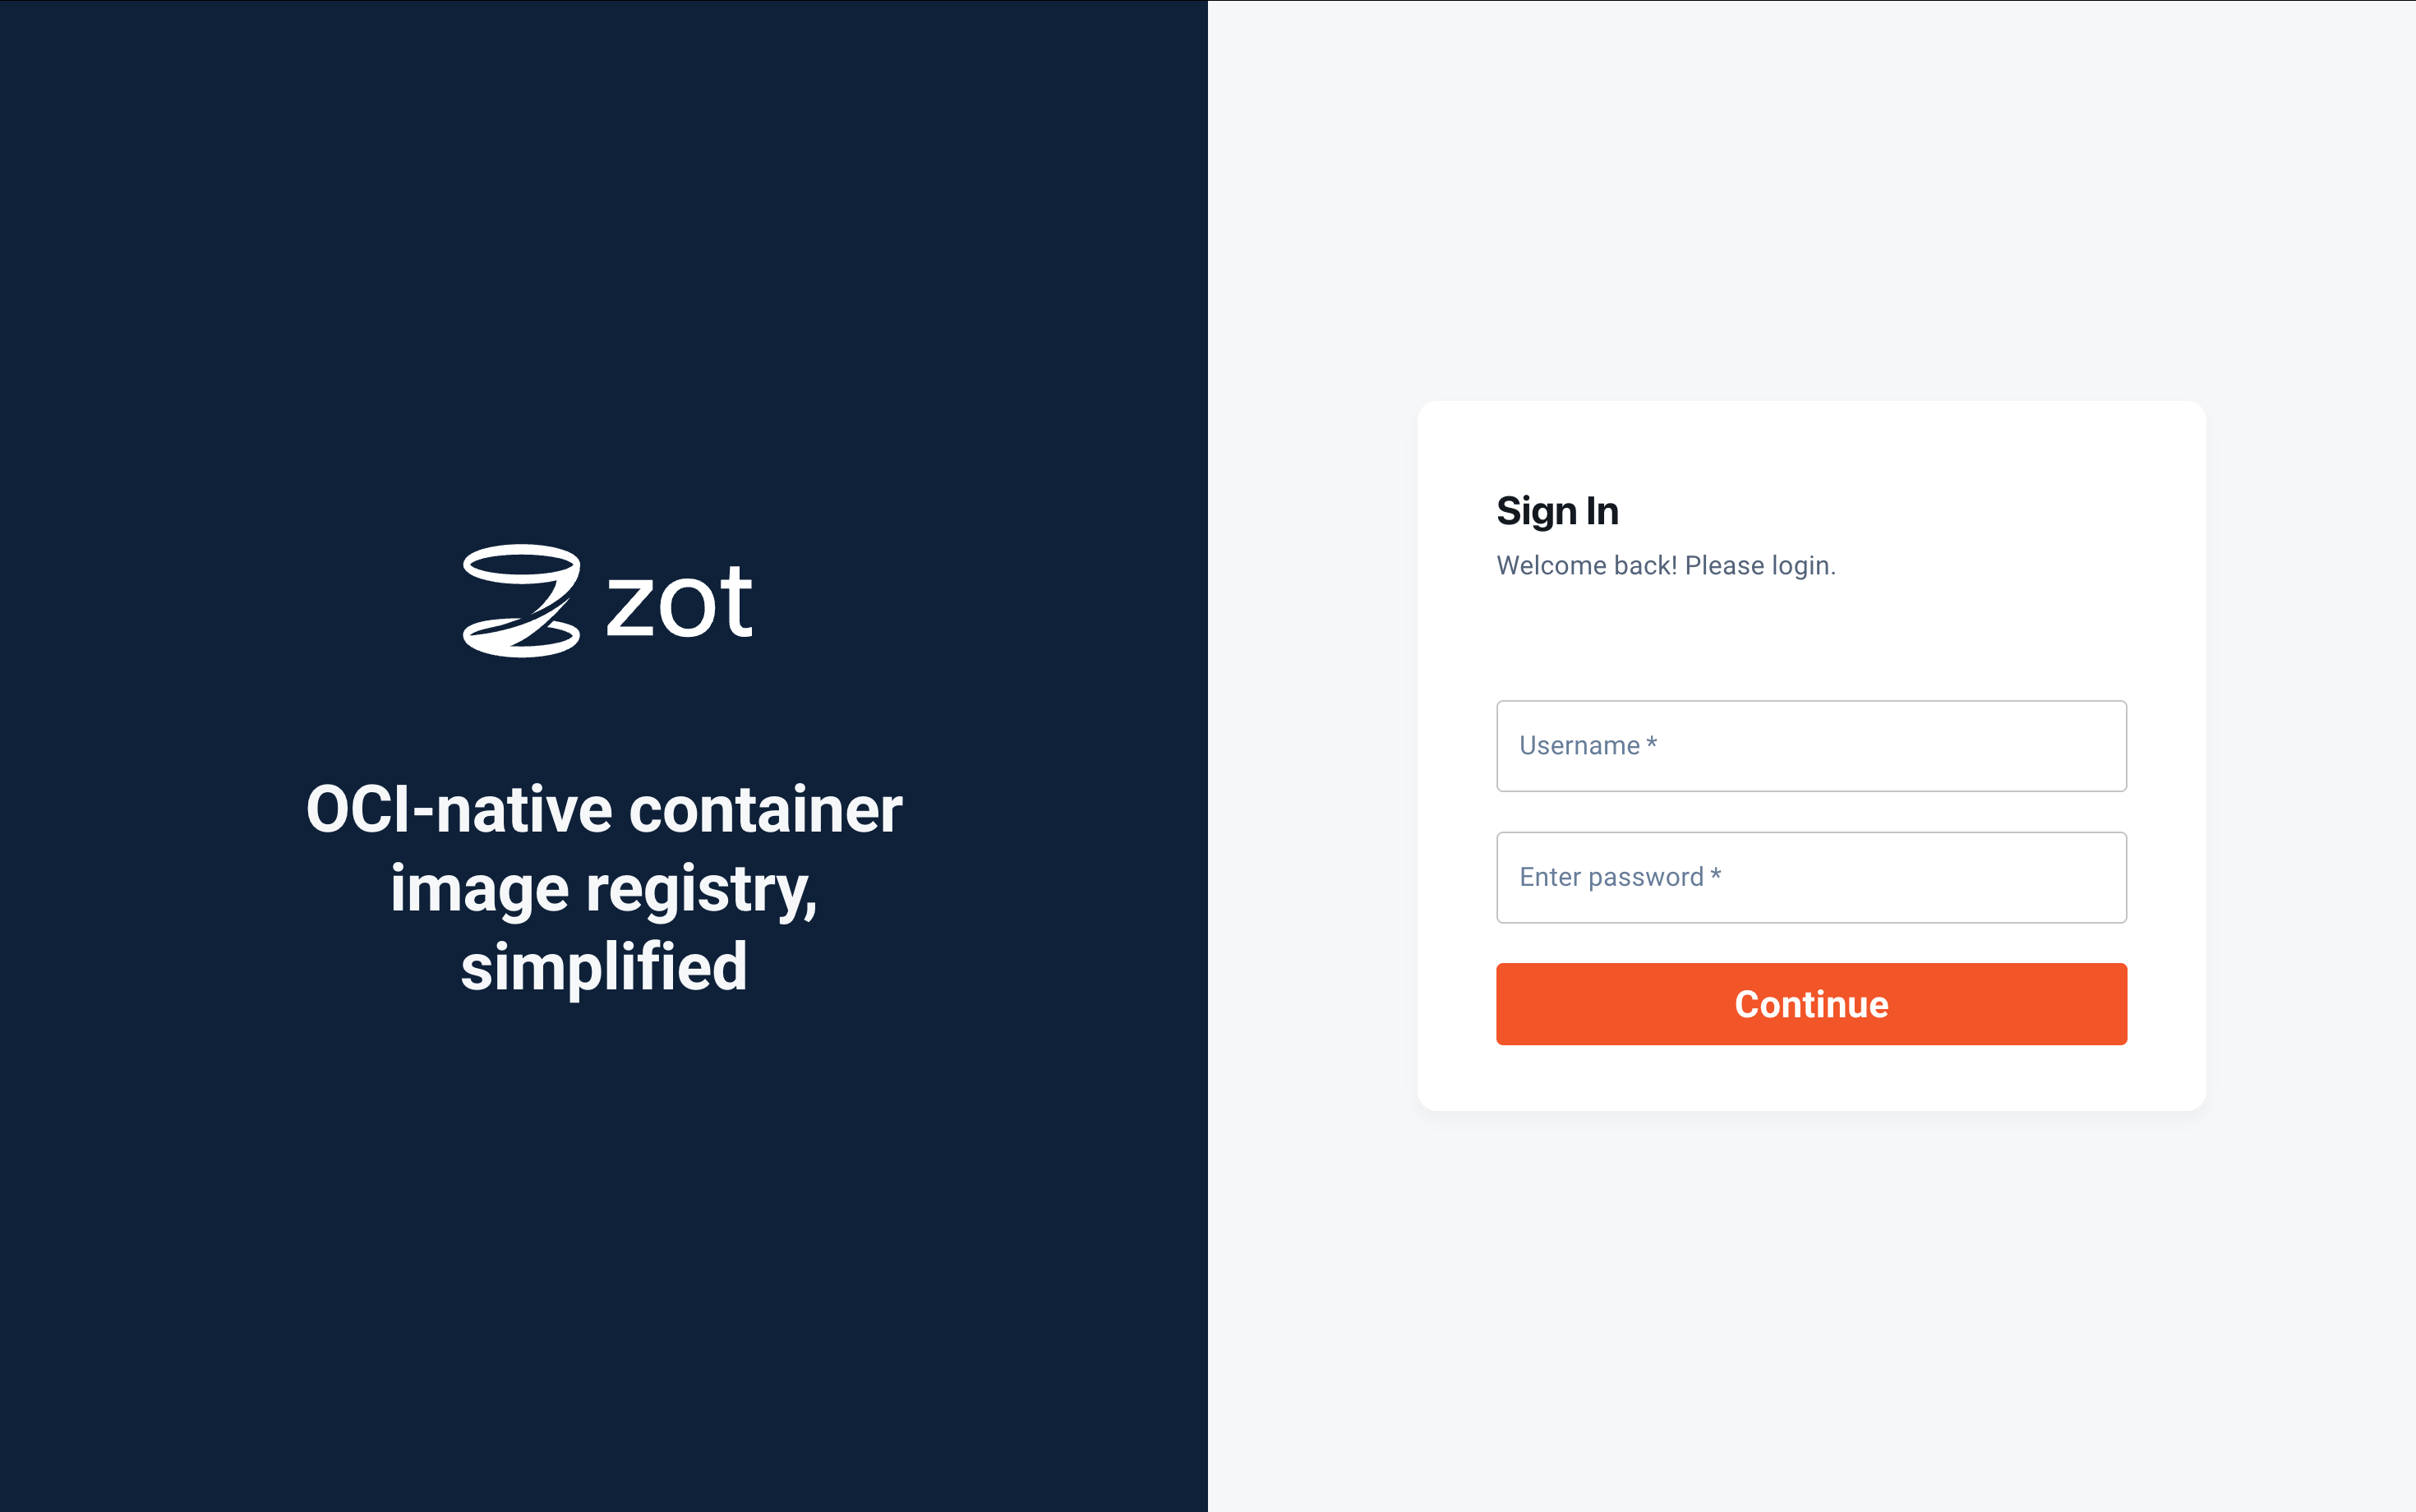
{}Open the web interface:
https://registry.example.comUse the same admin username and password created in the htpasswd file.
11. Push and pull an image
Log in from your development machine:
docker login registry.example.comBuild and tag an image:
docker build \
  -t registry.example.com/apps/my-app:latest \
.Push it:
docker push registry.example.com/apps/my-app:latestPull it on another server:
docker login registry.example.com --username app-server

docker pull registry.example.com/apps/my-app:latestThe app-server account can pull that repository but cannot push to it. It also cannot read other repositories.
You can test the restriction with a temporary Docker credential directory:
TEST_DOCKER_CONFIG="$(mktemp -d)"

DOCKER_CONFIG="$TEST_DOCKER_CONFIG" \
  docker login registry.example.com \
  --username app-server

DOCKER_CONFIG="$TEST_DOCKER_CONFIG" \
  docker pull registry.example.com/apps/my-app:latest

rm -rf "$TEST_DOCKER_CONFIG"12. Publish images with GitHub Actions
Add two repository secrets in GitHub:
ZOT_USERNAME=github-ci
ZOT_PASSWORD=the-password-created-for-github-ciCreate .github/workflows/docker.yml:
name: Build and publish image

on:
  push:
    branches:
      - main

env:
  REGISTRY: registry.example.com
  IMAGE_NAME: apps/my-app

jobs:
  build-and-push:
    runs-on: ubuntu-latest

    permissions:
      contents: read

    steps:
      - name: Check out repository
        uses: actions/checkout@v6

      - name: Set up Docker Buildx
        uses: docker/setup-buildx-action@v4

      - name: Log in to the private registry
        uses: docker/login-action@v4
        with:
          registry: ${{ env.REGISTRY }}
          username: ${{ secrets.ZOT_USERNAME }}
          password: ${{ secrets.ZOT_PASSWORD }}

      - name: Build and push image
        id: build
        uses: docker/build-push-action@v7
        with:
          context: .
          push: true
          tags: |
            ${{ env.REGISTRY }}/${{ env.IMAGE_NAME }}:latest
            ${{ env.REGISTRY }}/${{ env.IMAGE_NAME }}:${{ github.sha }}
          labels: |
            org.opencontainers.image.source=${{ github.server_url }}/${{ github.repository }}
            org.opencontainers.image.revision=${{ github.sha }}
          cache-from: type=gha
cache-to: type=gha,mode=maxEach push to main publishes:
registry.example.com/apps/my-app:latest
registry.example.com/apps/my-app:<commit-sha>The registry must be reachable from a GitHub-hosted runner. If the registry is only available on a private network, use a self-hosted runner or connect the job to that network with a tool such as Tailscale.
GitHub recommends pinning third-party actions to full commit SHAs for stronger supply chain safety. Version tags make the example easier to read, but production workflows can replace them with reviewed commit SHAs.
13. Deploy the private image with Docker Compose
On the production server, log in once using the read-only account:
docker login registry.example.com --username app-serverUse the image in your application Compose file:
services:
  app:
    image: registry.example.com/apps/my-app:${IMAGE_TAG:-latest}
restart: unless-stoppedDeploy the newest image:
docker compose pull
docker compose up -dFor a fixed release, set the commit SHA:
IMAGE_TAG=0123456789abcdef docker compose pull
IMAGE_TAG=0123456789abcdef docker compose up -dUsing an immutable commit tag makes rollback much easier than relying only on latest.
14. Turn on retention after checking the logs
The example starts with retention in preview mode:
"dryRun": trueWatch the registry logs:
docker compose logs -f zot | \
grep -Ei 'retention|delete|remove|garbage'Once the output matches what you expect, change the setting to:
"dryRun": falseValidate and recreate Zot:
docker compose run --rm zot verify /etc/zot/config.json
docker compose up -d --force-recreateThe policy now keeps the 10 most recently pushed tags in every repository and makes older tags eligible for removal.
Retention and garbage collection deserve care. Back up important release references, use fixed version tags, and test the rule before enabling deletion.
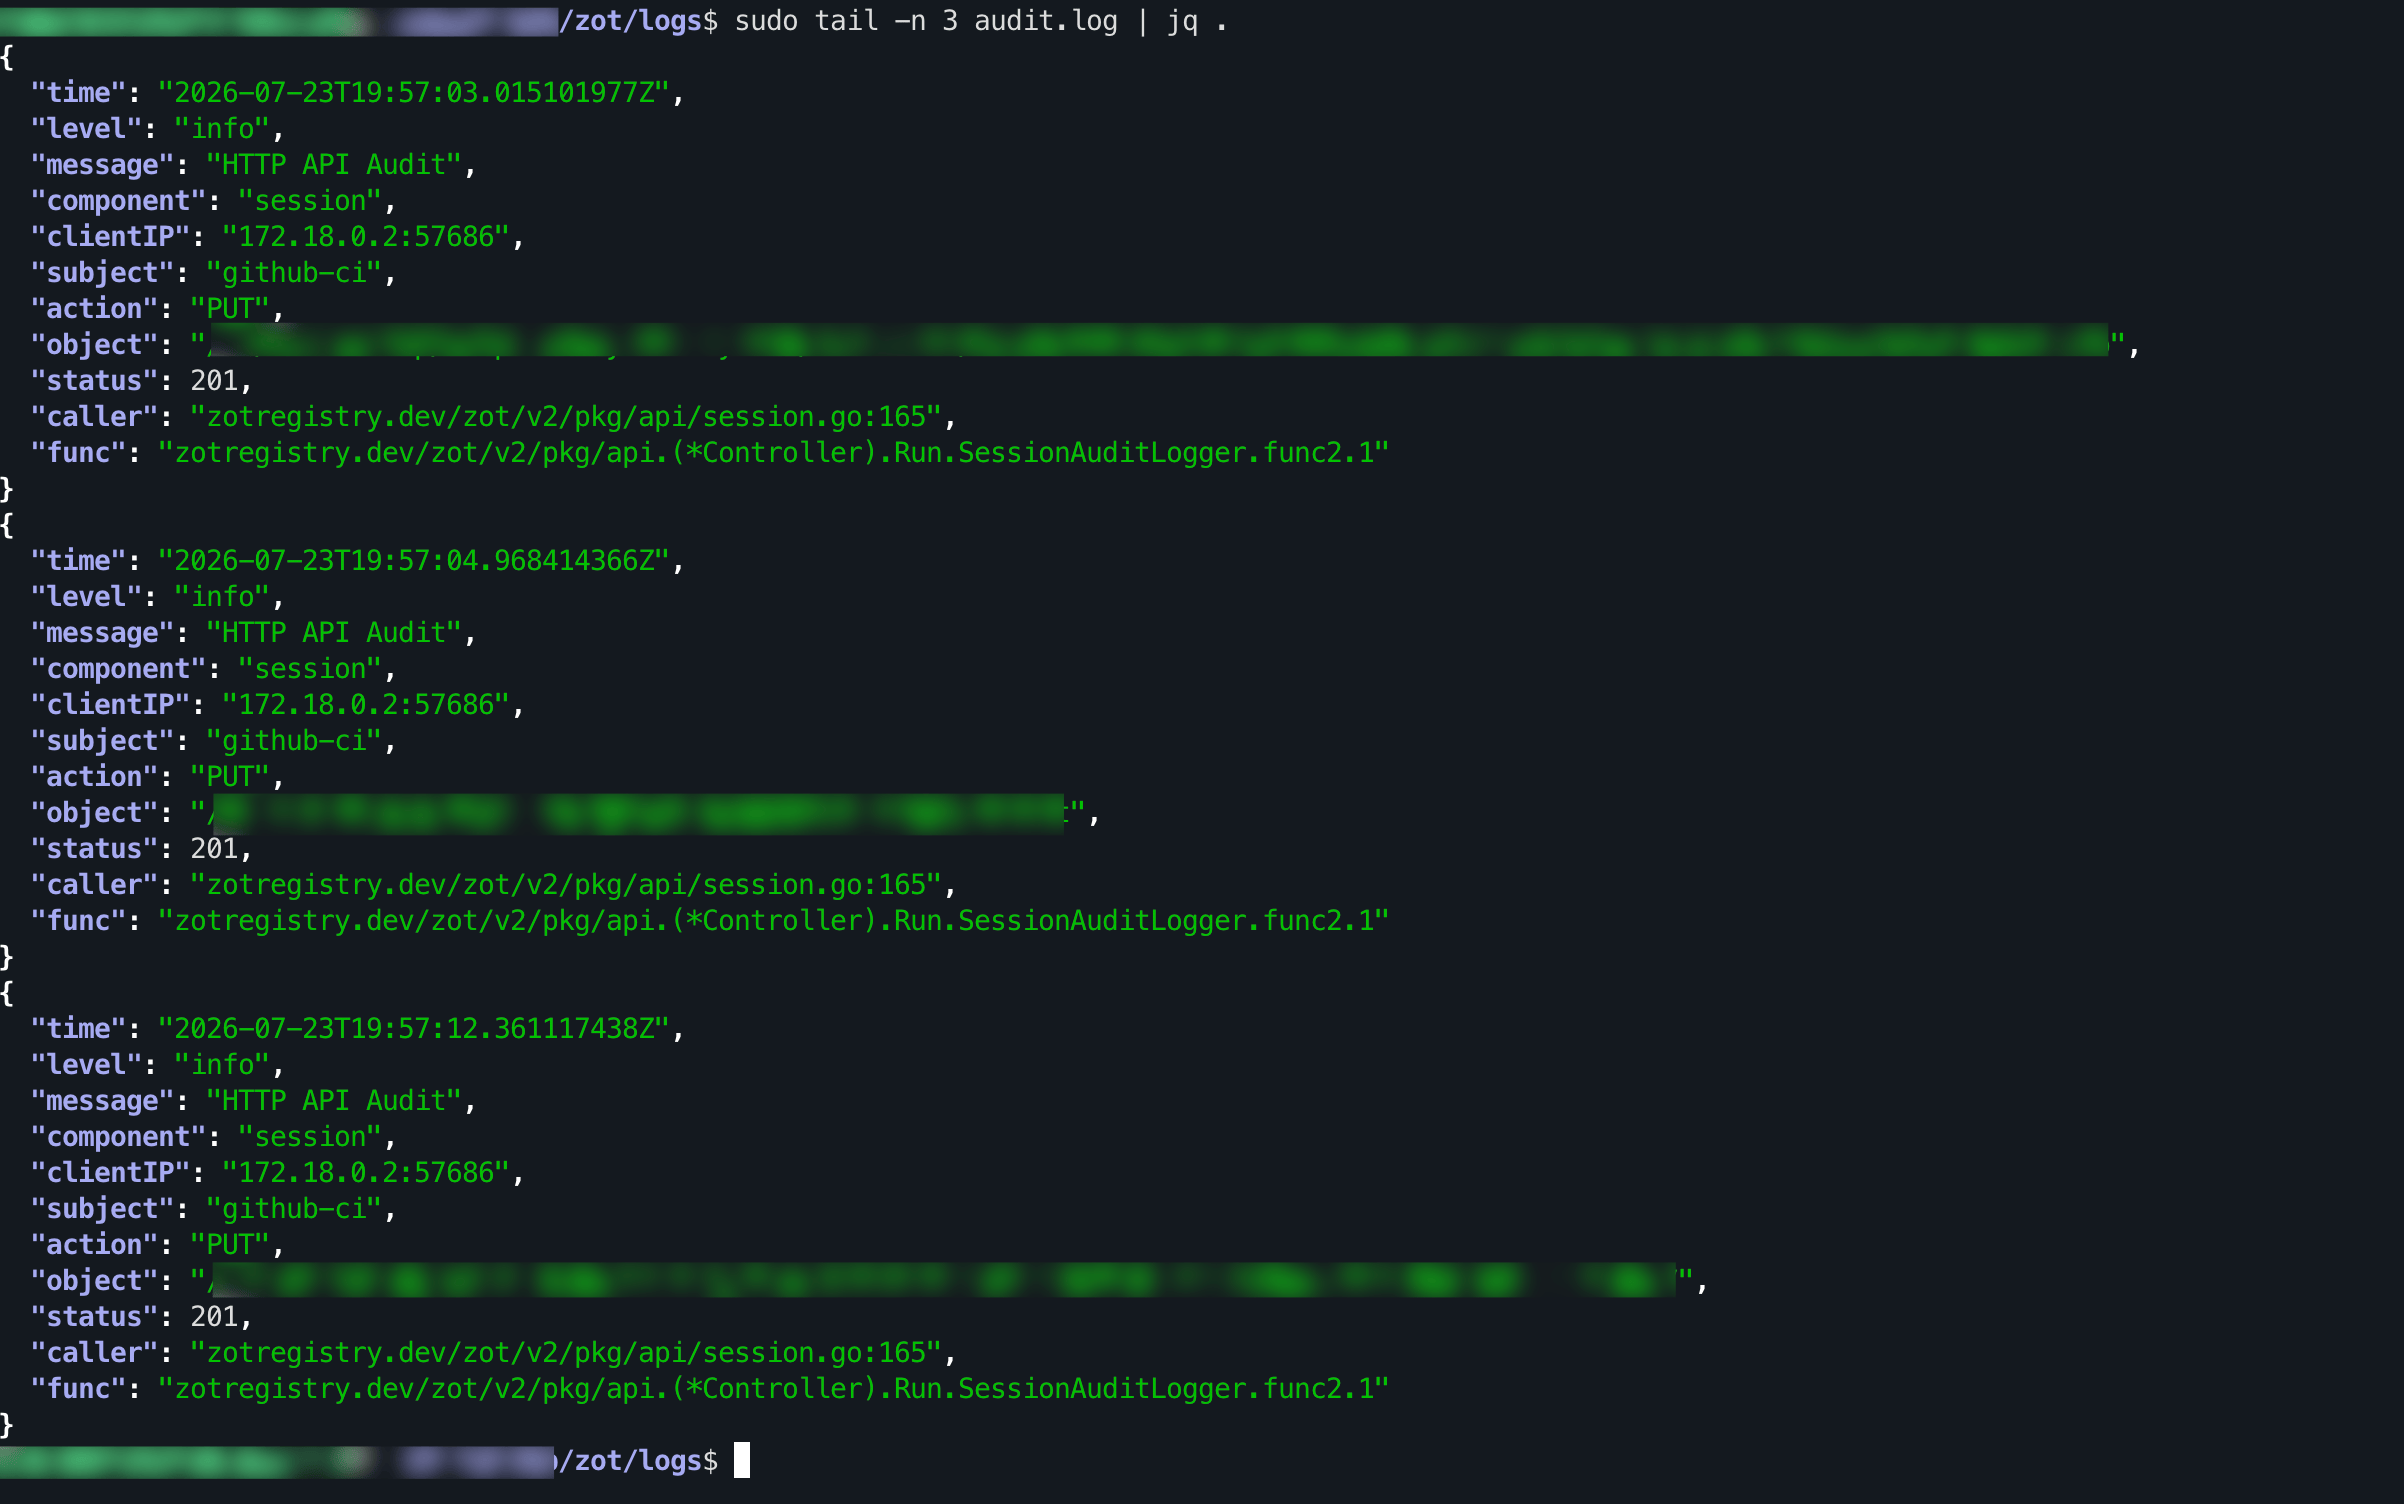
15. Read the audit logs
The configuration writes audit events to:
./logs/audit.logFollow the file:
tail -f logs/audit.logThe Zot web interface does not provide a full audit log viewer. The file can later be collected by Loki, Vector, Fluent Bit, or another log system.
Audit logs are useful for checking authentication attempts, pushes, pulls, deletions, and other registry requests.
16. Check storage integrity with scrubbing
The configuration runs a scrub every 24 hours:
"scrub": {
  "enable": true,
  "interval": "24h"
}Scrubbing walks through the registry data and verifies that stored blocks are readable. It can add some load while it runs, so schedule it with that in mind on a busy registry.
Watch for scrub messages:
docker compose logs -f zot | grep -i scrub17. Scan images in CI with Trivy
Because Zot's built-in scanner is not supported with remote cloud storage, scan the image during CI instead.
Add this after the build and push step:
- name: Scan image with Trivy
  uses: aquasecurity/[email protected]
  with:
    image-ref: ${{ env.REGISTRY }}/${{ env.IMAGE_NAME }}:${{ github.sha }}
    format: table
    exit-code: "1"
    ignore-unfixed: true
    vuln-type: os,library
severity: CRITICAL,HIGHThe earlier Docker login step gives Trivy access to the private image.
Use exit-code: "0" when first introducing scanning if you only want a report. Change it to "1" when you are ready to block builds with high or critical findings.
Security actions have had supply chain incidents in the past, so review current release notes and pin actions to trusted commit SHAs in production workflows.
18. Sign images with Cosign
Zot can store OCI signatures and show whether an image has a signature. Pushing an image does not sign it automatically.
Install Cosign in the workflow:
- name: Install Cosign
uses: sigstore/[email protected]A simple key-based signing step can sign the digest returned by the build action:
- name: Sign image
  env:
    COSIGN_PRIVATE_KEY: ${{ secrets.COSIGN_PRIVATE_KEY }}
    COSIGN_PASSWORD: ${{ secrets.COSIGN_PASSWORD }}
    IMAGE: ${{ env.REGISTRY }}/${{ env.IMAGE_NAME }}
    DIGEST: ${{ steps.build.outputs.digest }}
  run: |
    printf '%s' "$COSIGN_PRIVATE_KEY" > cosign.key
    chmod 600 cosign.key

    cosign sign \
      --yes \
      --key cosign.key \
      "${IMAGE}@${DIGEST}"

rm -f cosign.keyGenerate the key pair once on a trusted machine:
cosign generate-key-pairStore the private key and password as GitHub secrets. Keep the public key for verification:
cosign verify \
  --key cosign.pub \
registry.example.com/apps/my-app:latestSigning and vulnerability scanning solve different problems. Scanning checks for known package issues. Signing proves that an image was signed by a trusted key.
Other Zot features worth exploring
Once the basic registry is stable, Zot has several useful additions.
Prometheus metrics
The full Zot image can expose metrics at /metrics:
"metrics": {
  "enable": true,
  "prometheus": {
    "path": "/metrics"
  }
}You can protect the endpoint through the metrics access-control settings and scrape it with Prometheus.
Scoped API keys
With this setting already enabled:
"apikey": trueUsers can create API keys with repository scopes and expiration dates. This is better than storing a main account password on every server.
OIDC login
For a larger team, Zot can use GitHub, Google, GitLab, or a generic OpenID Connect provider instead of managing every human user through htpasswd.
Pull-through mirroring
Zot can mirror content from other registries and cache images on demand. This can reduce repeated external downloads and give you a controlled path for upstream images.
Helm charts and other OCI artifacts
Zot is not limited to Docker images. You can also store Helm charts and other OCI artifacts:
helm push my-chart.tgz \
oci://registry.example.com/chartsMultiple replicas
Zot can be scaled with shared remote storage and an external cache. For a small setup, one instance is much easier to operate. Add Redis and multiple replicas only after you have a real availability or throughput need.
Security checklist
Before treating the registry as production-ready:
- Use HTTPS only
- Use a private B2 bucket
- Keep S3 credentials in
.envor a secret manager - Use separate accounts for admins, CI, and deployment servers
- Give production servers read-only access
- Use API keys with expiry where possible
- Keep the Zot image pinned to a tested version
- Back up
config.json,htpasswd, and session keys securely - Start retention with
dryRun: true - Send audit logs to central storage
- Scan images before deployment
- Sign release images
- Protect the server with a firewall and regular updates
Final thoughts
Private Docker image hosting sounds like a large platform problem, but it does not have to be one.
With Zot, Docker Compose, an S3-compatible bucket, and either native TLS or an optional reverse proxy, you can build a practical private Docker registry with a web interface, repository-level permissions, automatic cleanup, audit logging, and CI support.
The part I like most is that the workflow stays familiar. Developers still use docker login, docker push, and docker pull. GitHub Actions still uses the standard Docker actions. Production servers only need a read-only account and the image name.
The result is a small piece of infrastructure that gives you more control without becoming a full-time project to maintain.