Skip Port Forwarding: SSH Into Your Home Server With Tailscale
Connect to a home server over SSH using its private Tailscale address, without forwarding port 22 on your router.
I run a small Ubuntu server at home and normally connect to it using its local IP:
ssh [email protected]That address is only reachable from my home network. I didn't want to forward port 22 through my router just so I could log in while I was away, so I installed Tailscale on the server and my laptop.
Once both machines are connected to Tailscale, I can use the server's name instead:
ssh harshal@home-serverAway from home, I run exactly the same command. I never had to change anything on my router.
This is regular OpenSSH running over a Tailscale connection. It isn't the separate Tailscale SSH feature. I've explained the difference later in the guide.
Why Tailscale?
Most home servers get a private address such as 192.168.1.50 from the router. Devices on the same network can reach it, but devices elsewhere cannot.
One option is to forward port 22 from the router to the server. I didn't want SSH open to the internet, so I skipped that setup.
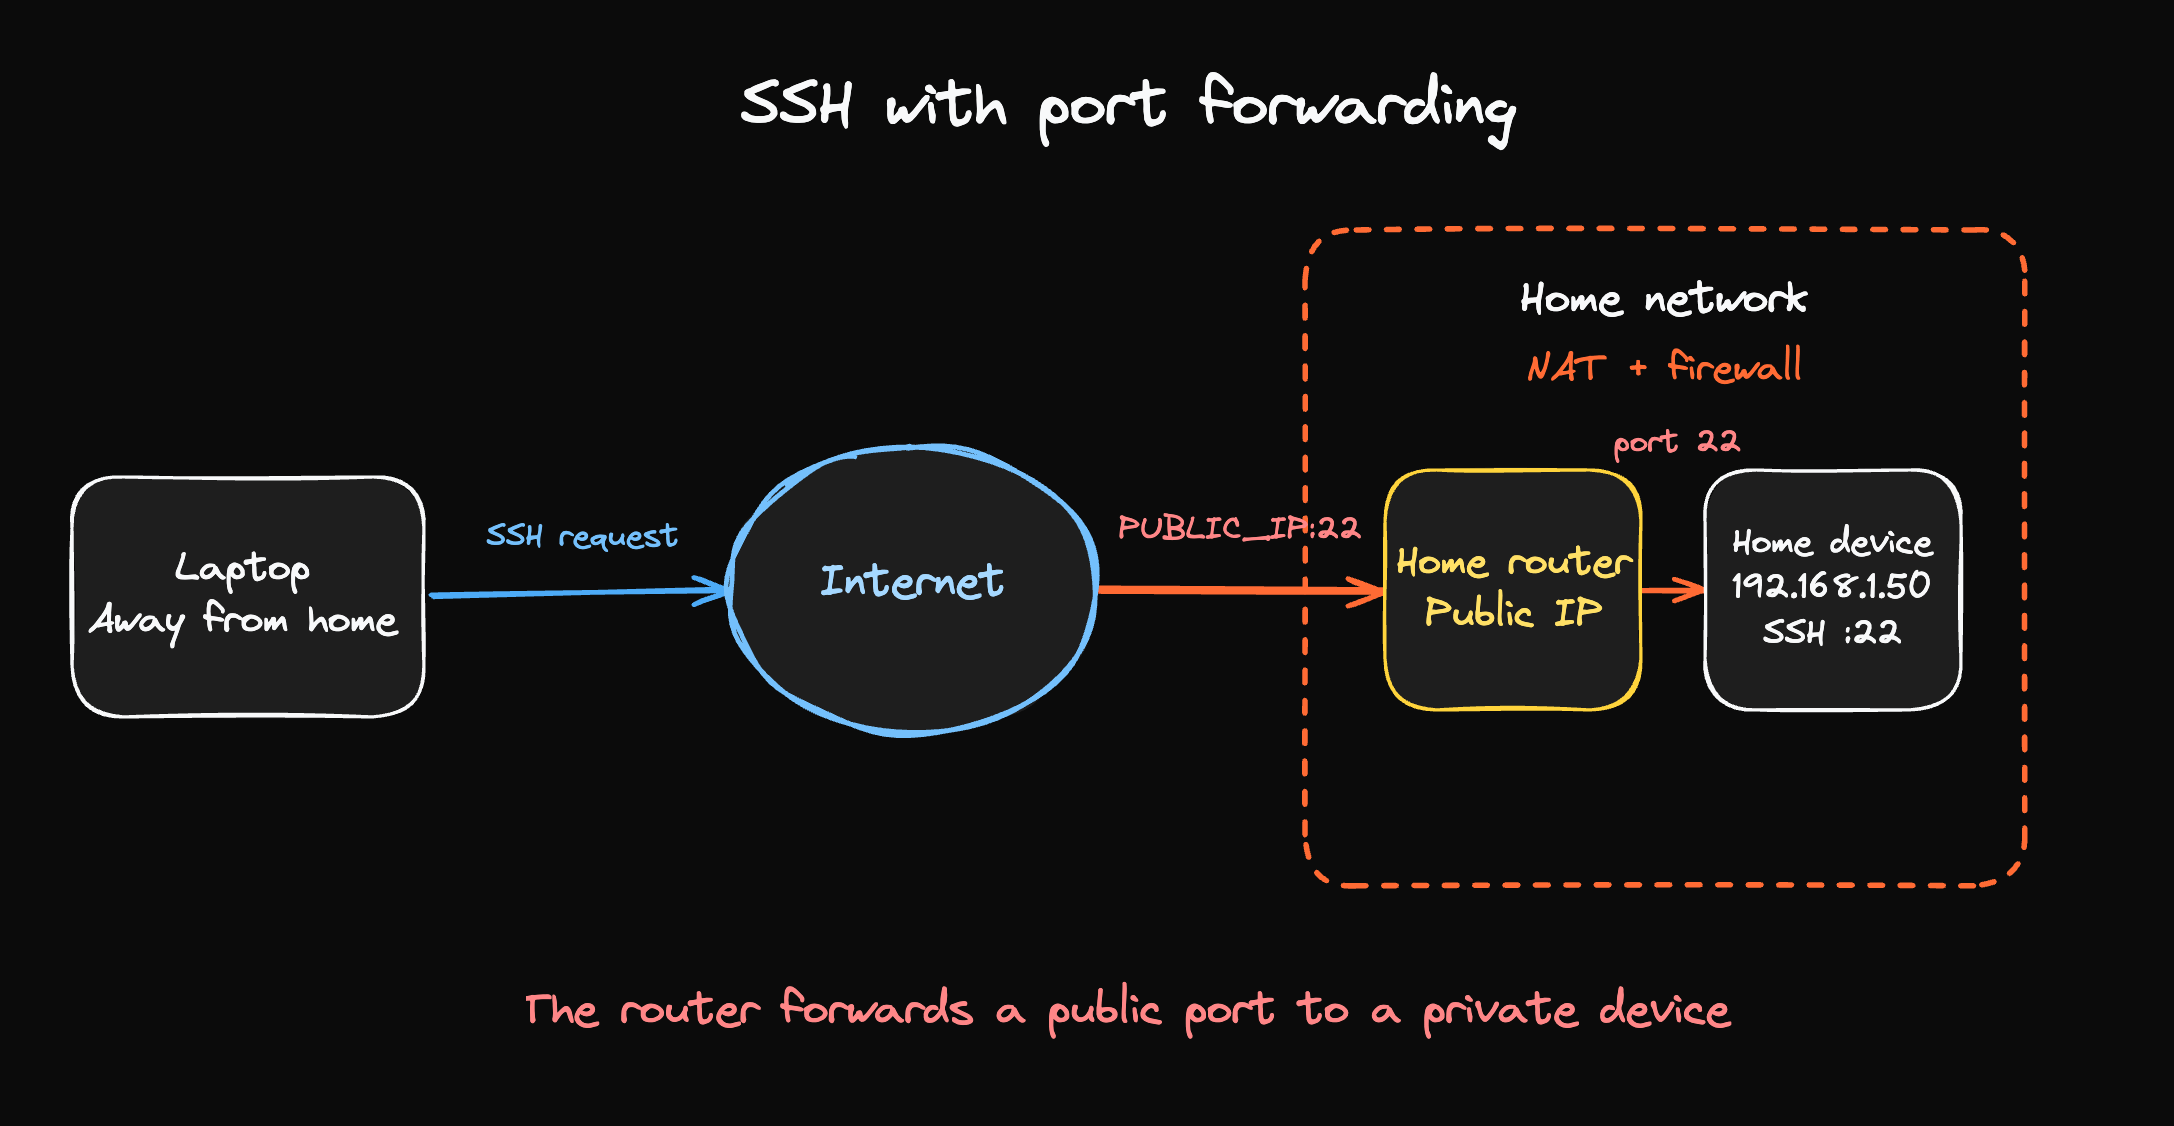
Tailscale gives each signed-in device another private IP address. My laptop connects to that address, so the traffic never needs an inbound route through the home router.
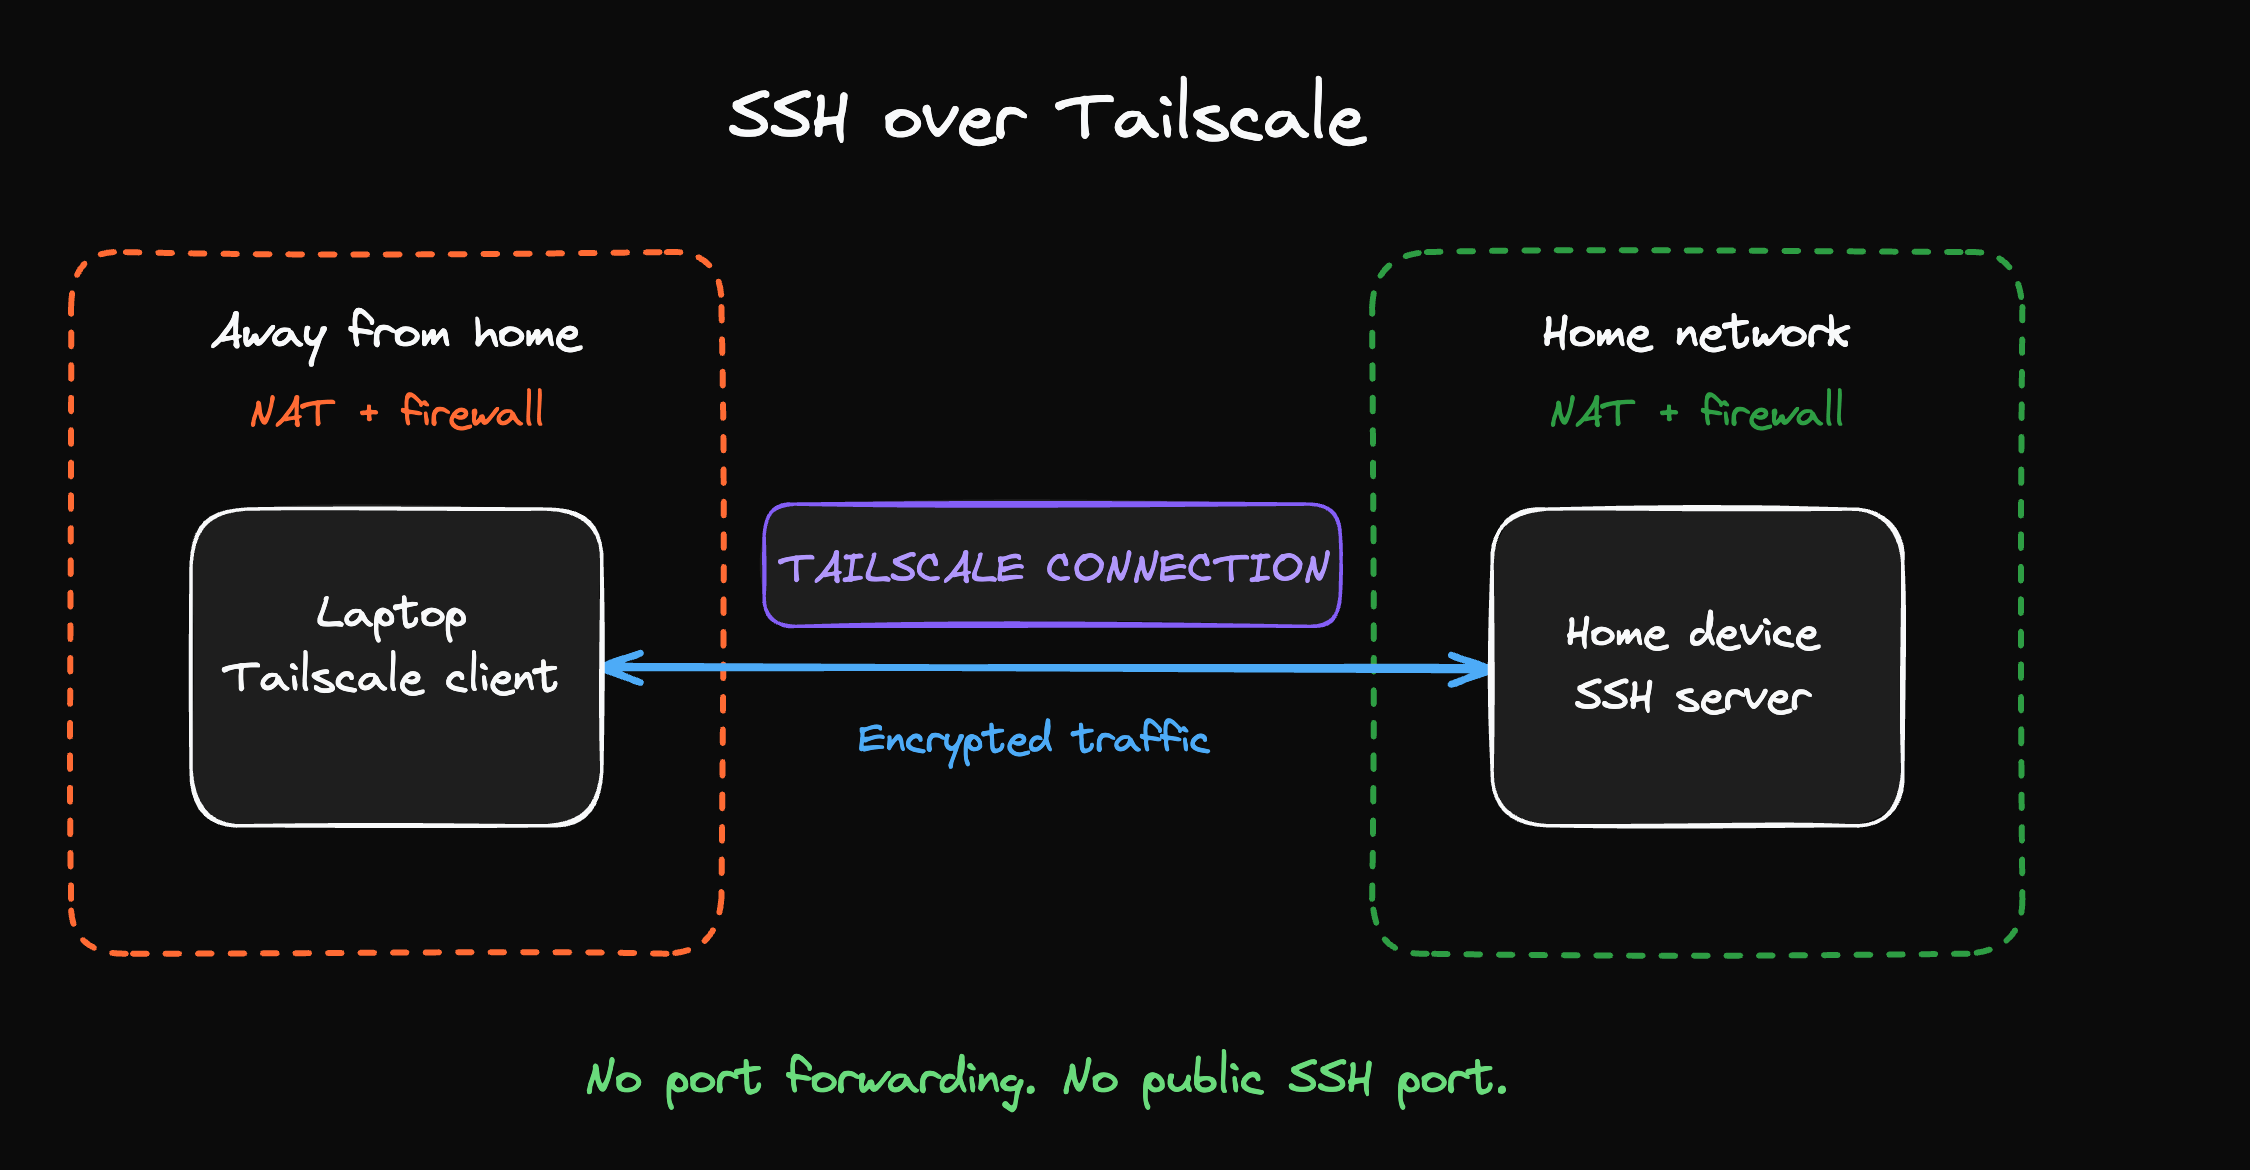
You don't actually need Linux or a dedicated server. In SSH terms, the server is simply the device accepting the connection. It could be a Linux machine, a Mac, or a Windows PC. You still need a destination device for SSH to connect to, but it can be an ordinary computer. If you're using Tailscale for something other than SSH, that device doesn't need an SSH server at all.
For this setup, you need:
- Two devices that can run Tailscale
- An SSH client on the device you're connecting from
- An SSH server on the device you want to connect to
- A free Tailscale account
- Both devices connected to the internet
The operating systems don't have to match. A Windows laptop can SSH into a Mac, for example. Install Tailscale on both, turn on Remote Login on the Mac, and connect from PowerShell with:
ssh mac_username@mac_hostnameI'm using an Ubuntu machine as the destination in this guide, so the installation commands below are for Ubuntu. The Tailscale part stays mostly the same on other platforms.
Setup
1. Check SSH on the destination
Before touching Tailscale, make sure the destination already accepts SSH connections.
On macOS, go to System Settings > General > Sharing and turn on Remote Login. On Windows, install and enable the OpenSSH Server optional feature.
On Ubuntu, install and start OpenSSH with:
sudo apt update
sudo apt install openssh-server
sudo systemctl enable --now sshCheck its status:
sudo systemctl status sshFrom another device on the home network, try connecting to the destination:
ssh [email protected]Use your own username and local IP address here. If the command fails, sort that out before continuing. Tailscale changes how one device reaches the other, but it doesn't fix the SSH service itself.
2. Install Tailscale on the destination
Install Tailscale on the device you want to reach. macOS and Windows users can use the Tailscale app. On Ubuntu, the official installer is:
curl -fsSL https://tailscale.com/install.sh | shIf you don't want to pipe a script into sh, the official Linux installation guide has package instructions for each distribution.
When the install finishes, connect the Ubuntu machine to your tailnet:
sudo tailscale upIt'll print an authentication link. Open it, sign in, and approve the device. Back in the terminal, check that it joined the tailnet:
tailscale statusYou can also print the new Tailscale IPv4 address:
tailscale ip -4Mine looks like this:
100.83.24.103. Install Tailscale on the device you're connecting from
Install the Tailscale app on the other device and sign in to the same account. This device can also run macOS, Windows, or Linux.
The status command should now list both machines:
tailscale status4. Connect from another network
For the first test, take the laptop off your home Wi-Fi. I used a phone hotspot so I knew the local network wasn't involved. Then connect using the Tailscale IP from step 2:
ssh [email protected]You should get the usual SSH prompt followed by the remote shell.
Connect using the device name
The IP address works, but I don't want to remember it. Tailscale's MagicDNS gives each device a hostname. It's enabled by default on newer tailnets, and its setting is on the DNS page in the Tailscale admin console.
My server is named home-server, so I checked the name from my laptop:
tailscale ping home-serverAfter that worked, I connected with:
ssh harshal@home-serverAdd a short SSH alias
I also added an entry to ~/.ssh/config:
Host home
    HostName home-server
User harshalThat shortens the command to:
ssh homeRegular SSH vs Tailscale SSH
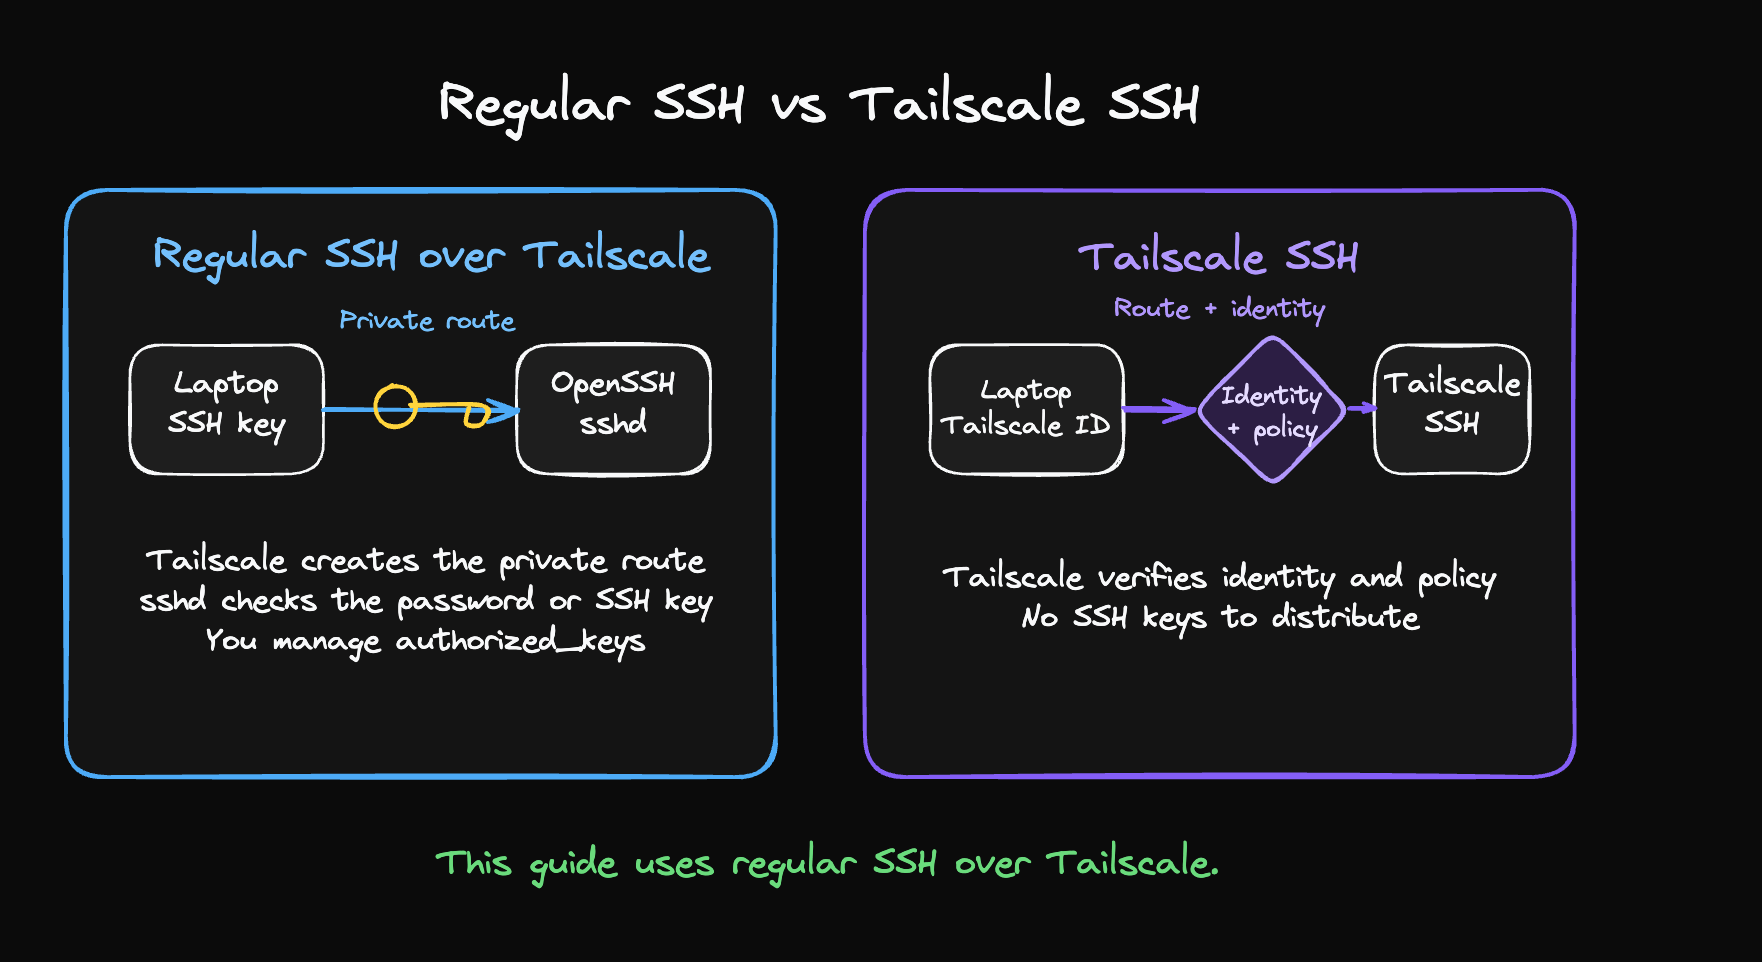
The setup so far still uses OpenSSH for authentication. My existing SSH keys continue to work as before. Tailscale is only carrying the connection between the two devices. This works across Linux, macOS, and Windows as long as the destination has an SSH server running.
Tailscale SSH can take over authentication and apply access rules from the tailnet policy. It is optional and can be enabled on a supported destination with:
sudo tailscale set --sshI've kept it disabled for this guide. Regular SSH is enough for my setup, and it makes it clear which part Tailscale is solving.
There is also an important platform difference. The Tailscale SSH server component currently works on Linux and on macOS devices using Tailscale's open source CLI build. It doesn't run as an SSH server on the standard Windows or macOS Tailscale apps. You can still connect from any platform running Tailscale.
Optional: restrict SSH to Tailscale
There's nothing else to close on a home router if port 22 was never forwarded in the first place.
The situation is different on a VPS where SSH may already be public. With UFW, this rule allows it on the Tailscale interface:
sudo ufw allow in on tailscale0 to any port 22 proto tcpKeep the existing SSH session open. In a second terminal, confirm that the Tailscale connection works:
ssh [email protected]Don't remove the public rule until that test succeeds. I'd also check that the VPS provider has a web console available, just in case. A typo in a firewall rule can otherwise leave you locked out.
How I use it now
Most of the time, I forget Tailscale is even involved. I type ssh home, do whatever I logged in to do, and close the terminal. For my setup, that is much nicer than keeping a public route to port 22.