Figma to React with CodeParrot AI: Build Dashboard in minutes
Streamline your design-to-code workflow with CodeParrot: Convert Figma to React effortlessly, boost productivity, and create pixel-perfect components in minutes
If you're a developer who works with Figma designs, you probably know how time-consuming it can be to manually convert designs into React code. What if you could streamline your Figma to React workflow in just a few minutes? In this article, I'll be introducing you to CodeParrot a VSCode extension that was made just for that.
What is CodeParrot?
CodeParrot is a VSCode extension that helps you convert designs to production-ready code. It assists you in creating beautiful UI components in React, React Native, Flutter, Angular, Vue and many more. Whether you're working on Figma to React projects or other frameworks, it's a great tool for developers who want to save time and focus on building their applications.
Why use CodeParrot?
-
Speed: Ship your projects faster by converting designs to code in minutes.
-
Accuracy: Get pixel-perfect code that matches your designs.
-
Customization: Customize your components to match your design system.
-
Enhance existing code: Use CodeParrot to enhance your existing codebase.
Installation
CodeParrot is available as a VSCode extension. You can install it from the VSCode marketplace.
Detailed Steps
-
Open VSCode and go to the Extensions view by clicking on the square icon in the sidebar.
-
Open VS Code on your system.
-
Navigate to the Extensions tab on the sidebar (or use
Ctrl+Shift+X(Cmd+Shift+X) to open it). -
In the search bar, type CodeParrot and hit Enter.
-
Once you find the CodeParrot extension, click Install.
Once installed, you should see the CodeParrot icon in the sidebar, go ahead and create an account to start using the extension.
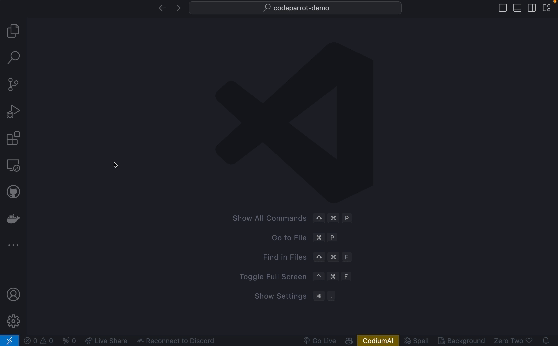
CodeParrot in Action
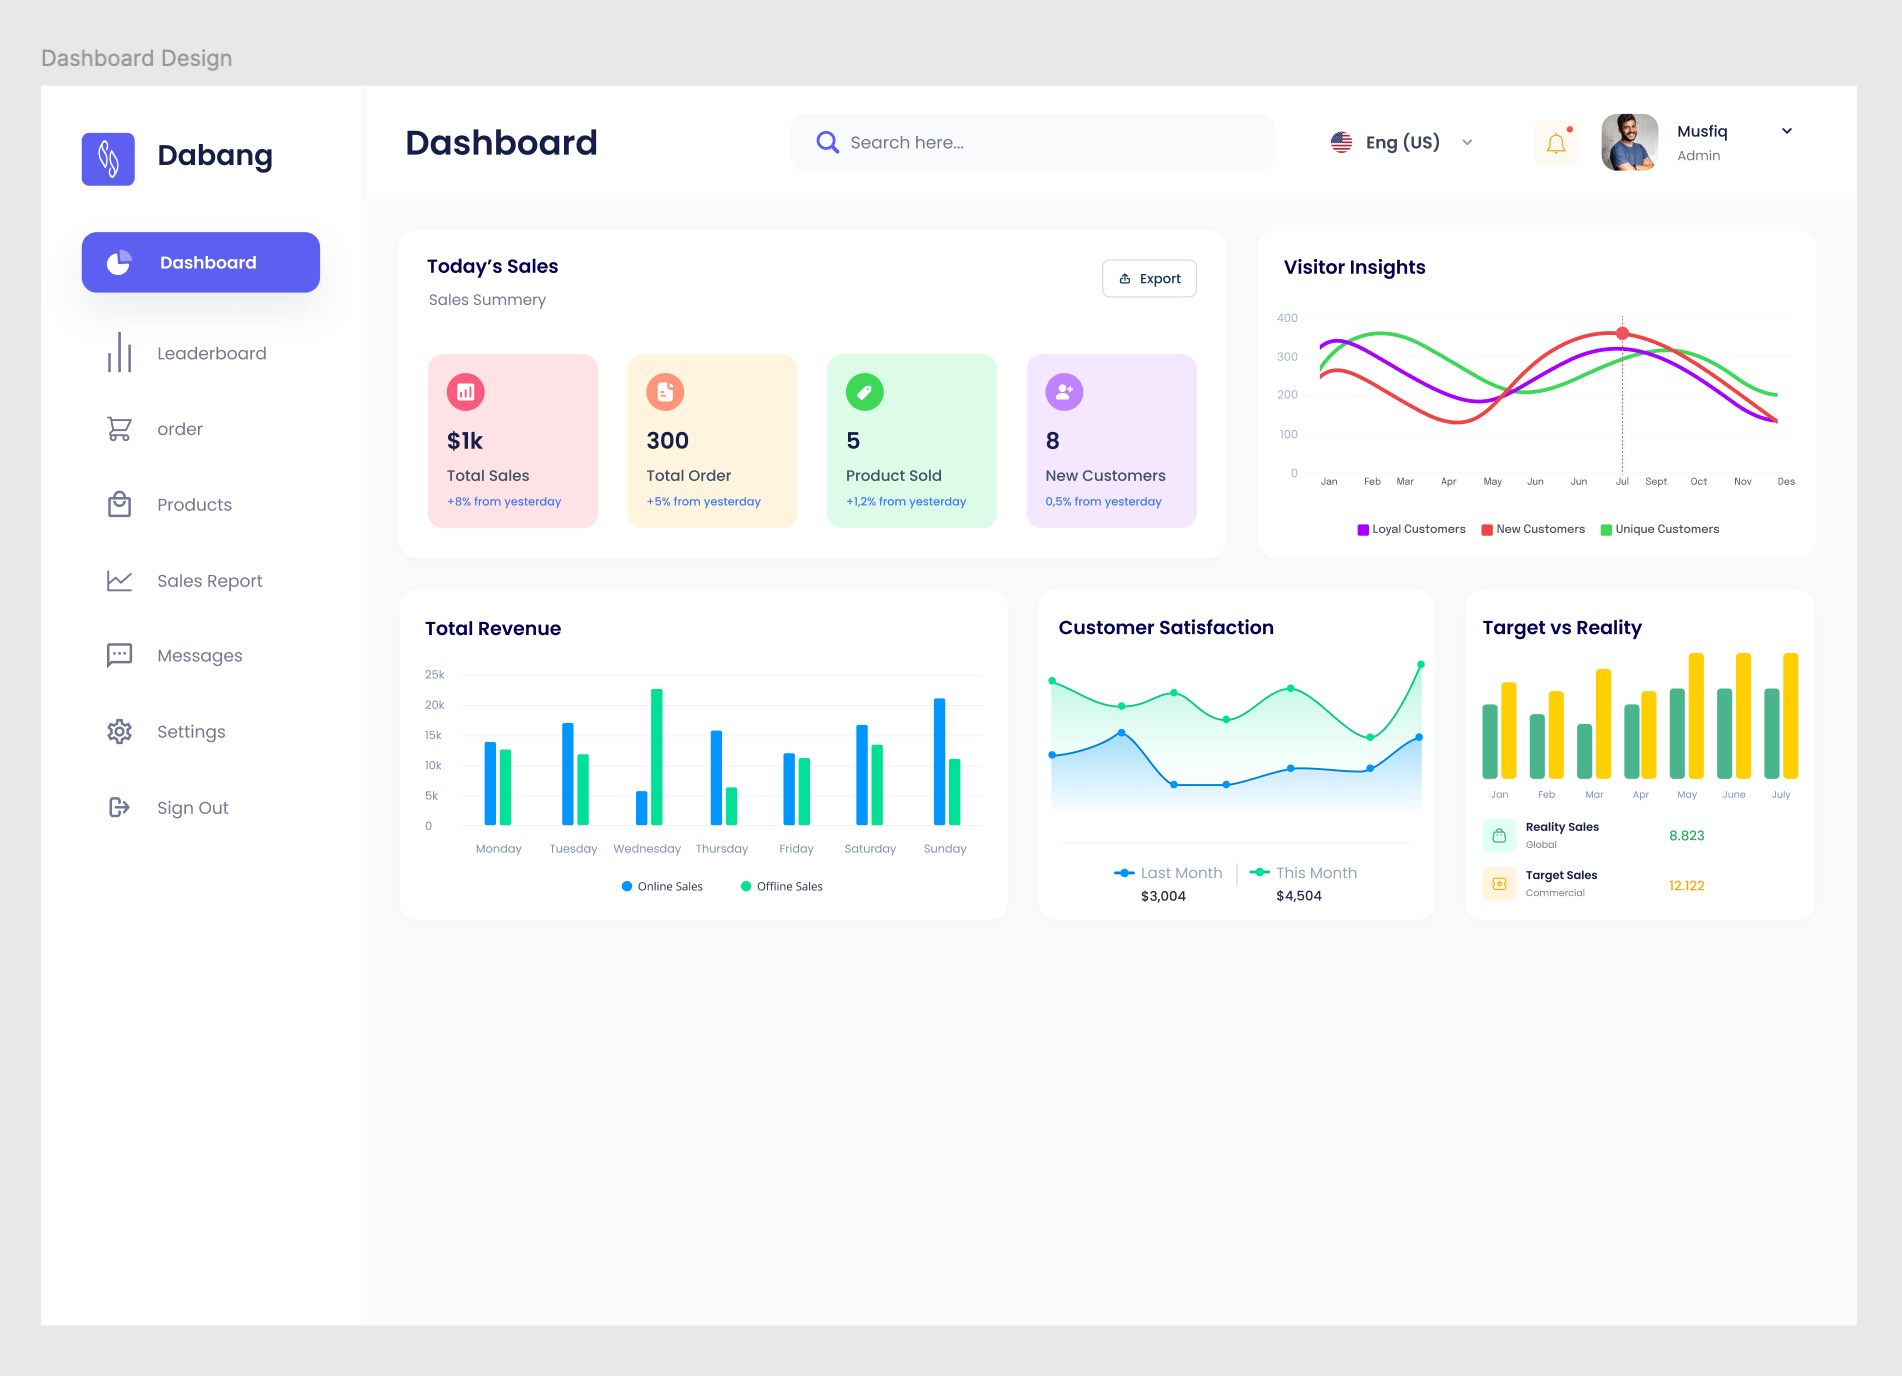
In this article I'll be using the following Figma design to demonstrate how CodeParrot works, showcasing its Figma to React capabilities among others.
How does CodeParrot work with Figma?
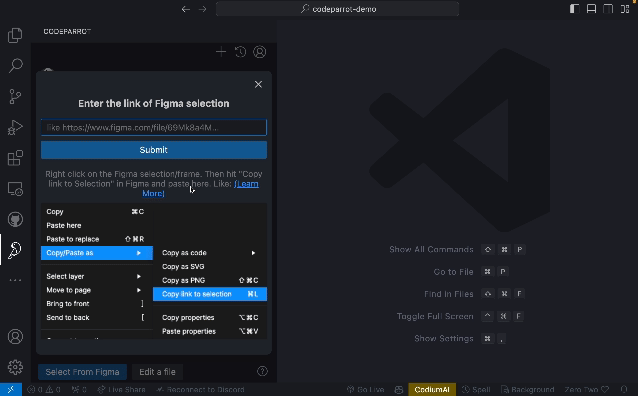
Once you Sign In, you'll see an option to **Select from Figma" in the CodeParrot extension UI. Click on it and you'll be prompted to enter the link of your Figma Selection.
What's a Figma Selection?
A Figma Selection is a group of layers in your Figma design that you want to convert to code. You can select a group of layers in Figma and copy the link to that selection. This link can then be used in CodeParrot to convert the selected layers to code.
Here's how you can copy the link to a Figma Selection:
- Open your Figma design.
- Select the layers you want to convert to code.
- Right-click on the selected layers and click on "Copy link to selection".

Once processed, you'll see your component loaded in CodeParrot.
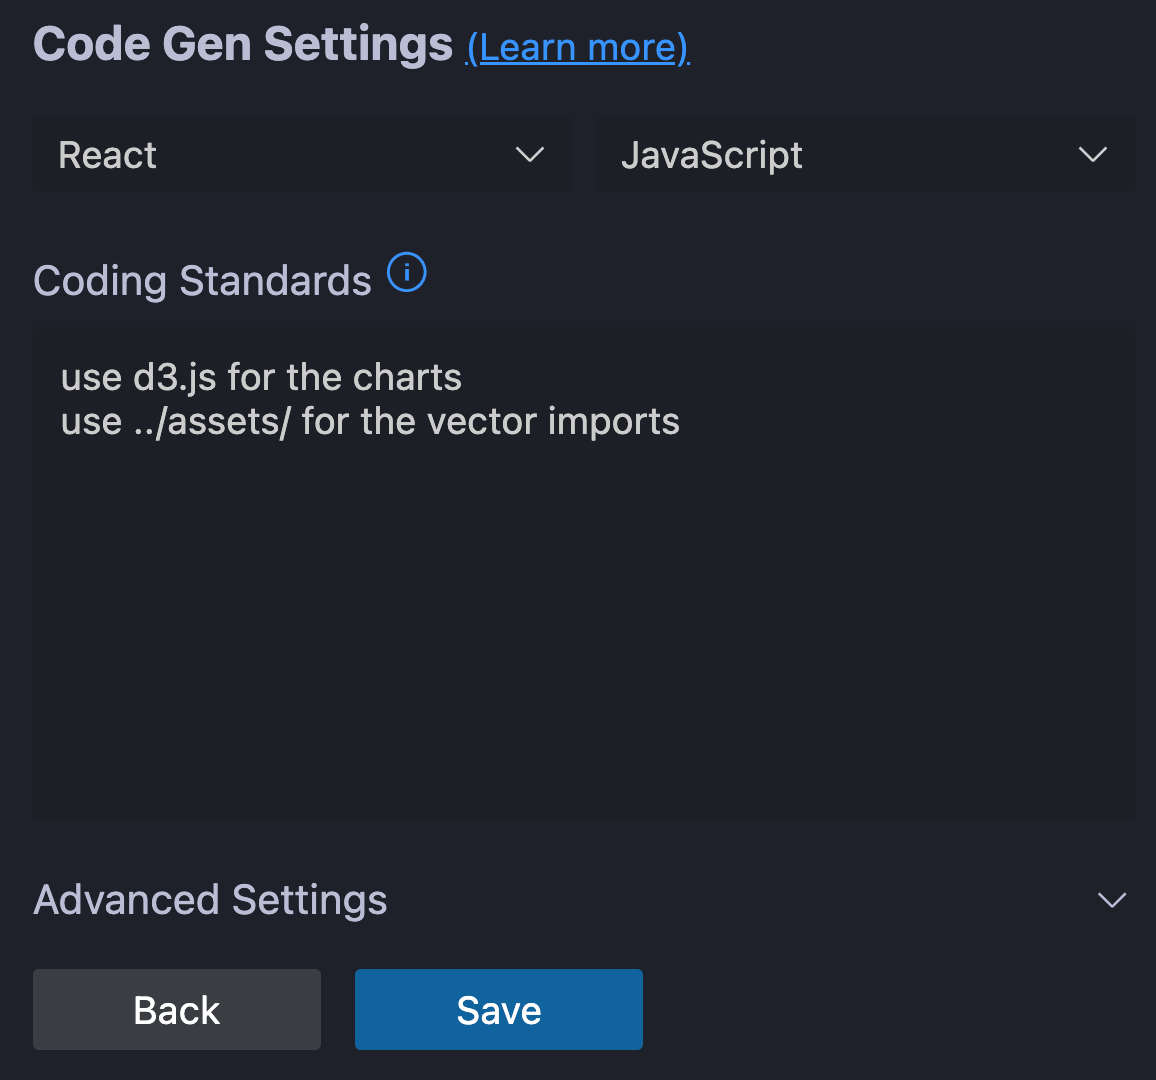
Specifying coding standards
CodeParrot allows you to specify coding standards for your components. You can choose the coding style, naming conventions, and other settings for your components, ensuring consistency in your Figma to React workflow and beyond.
There is also a menu to select the framework/language to be used for the code generation. You can choose from React, React Native, Flutter, Angular, Vue, and many more. You can choose between JavaScript and TypeScript as well.
You can add these by clicking on the settings Icon just above the input field for the conversation with CodeParrot.
Here I am using React as the framework and Javascript as the language.
Generating code
Once you've specified the coding standards, you can add more context or customizations in the given input field and click the Submit button to generate the code. This process works seamlessly for various design-to-code scenarios, including Figma to React conversions.
I have created the Sidebar component using CodeParrot as shown here It gave me a Sidebar.jsx and a Sidebar.css file.

Specifying libraries to use
In the coding standards, you can also specify the libraries you want to use in your component. For example, let's create the Visitor Insights component using CodeParrot. We will specifically be using d3.js for the chart in the component.
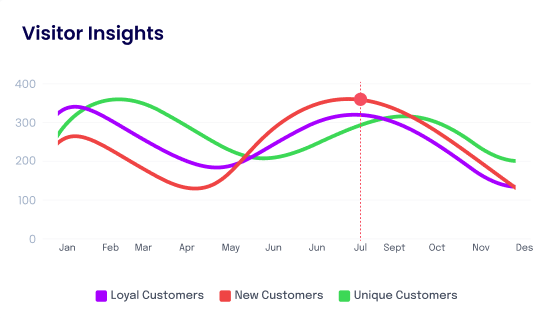
To achieve this, you can specify the libraries you want to use in the coding standards. Here I have added d3.js as a library to be used in the Visitor Insights component.
In the coding standards you can further specify how you want your imports to be added. For example I want my imports to be added as ../assets and not ./assets. So I can specify that and it will be taken care of for the next generated components.
Let's save and generate the code for the Visitor Insights component.
Here is the generated Visitor Insights component:

You can further modify the curve of the chart or any other customization you want to do by just doing it manually or specifying it in the input field which will be taken care of by CodeParrot.
Referencing files
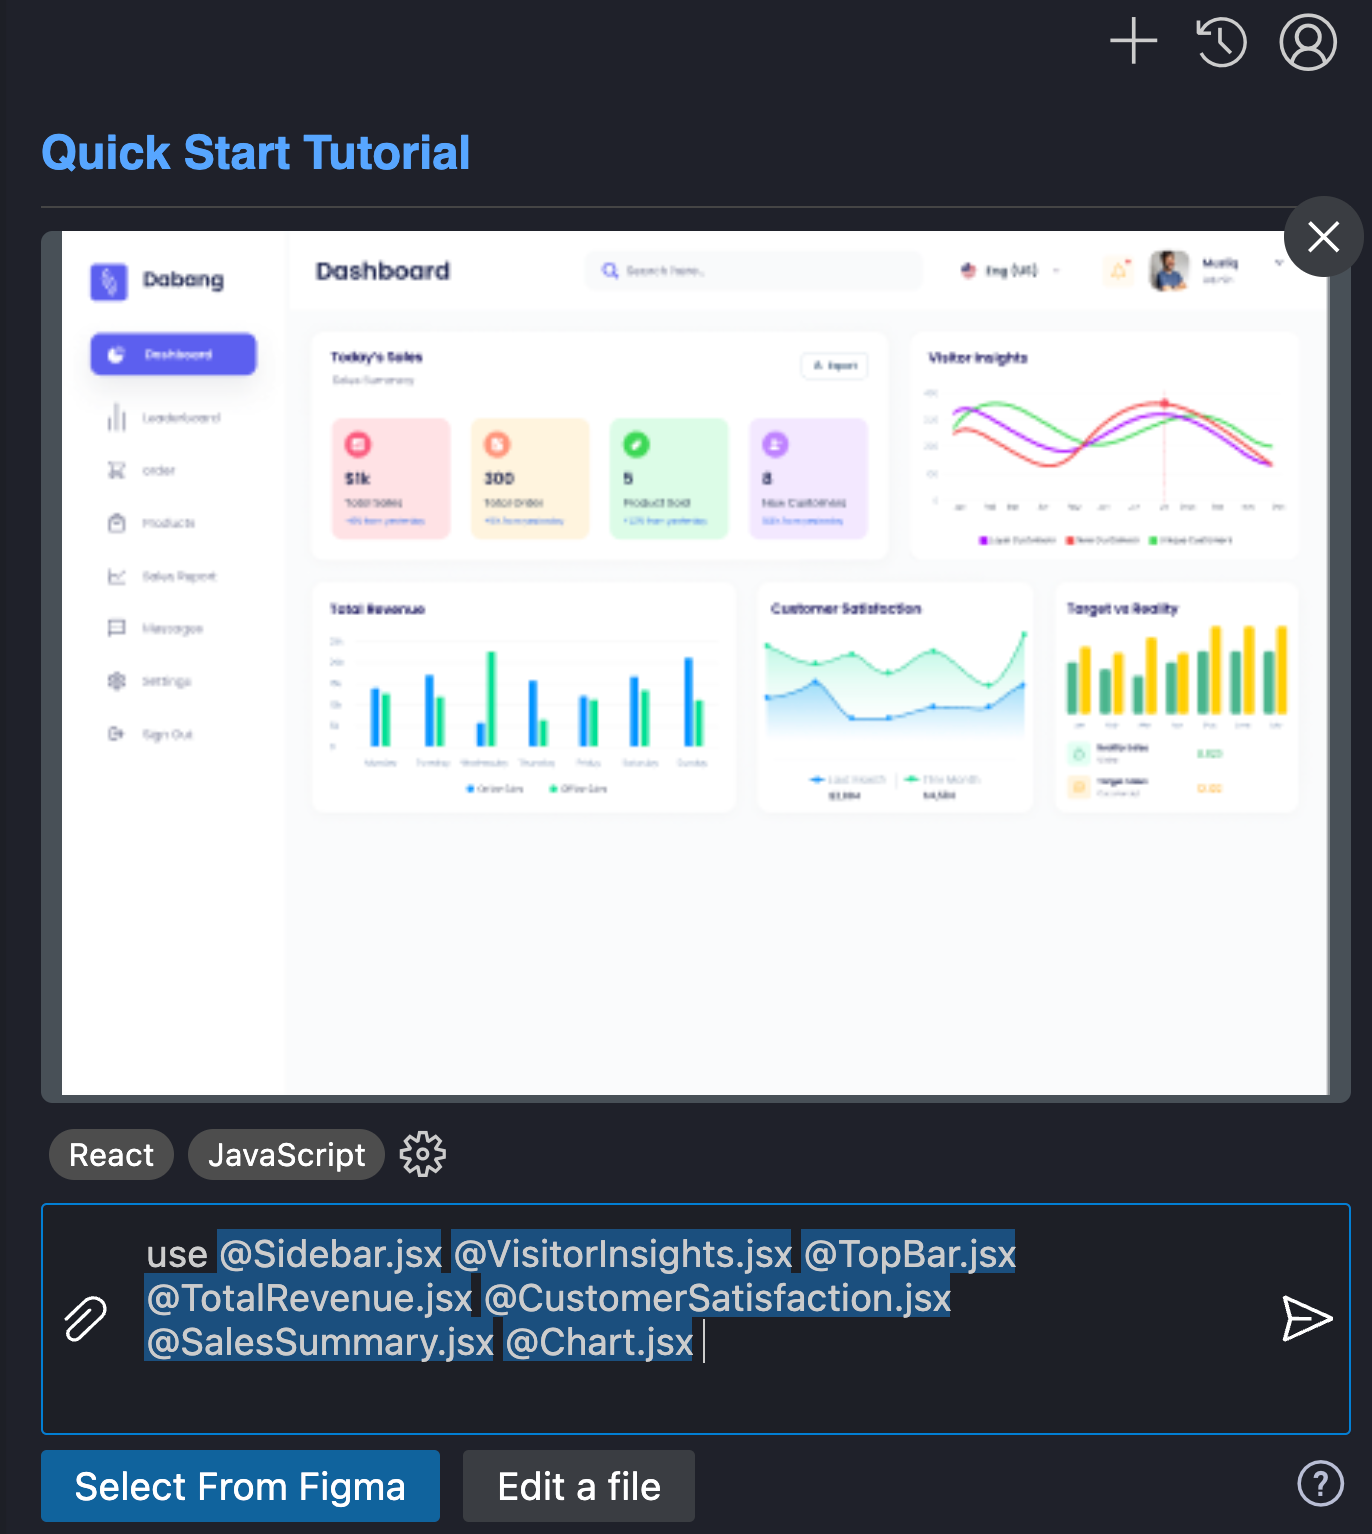
Let's say we want to create the whole dashboard components and we have a Sidebar, Visitor Insights, and User Insights components and other child components which we want CodeParrot to refer to.
This is possible by specifying the files you want to refer to by using the @ symbol followed by the file name.
First, let's add the dashboard figma design to CodeParrot.
If you're prompted to select a component from a list of multiple components, you can select the whole dashboard component. This will allow you to generate the whole dashboard component in one go.
Now we,ll reference the child components and instruct CodeParrot to refer to them.
Here is the generated Dashboard component:
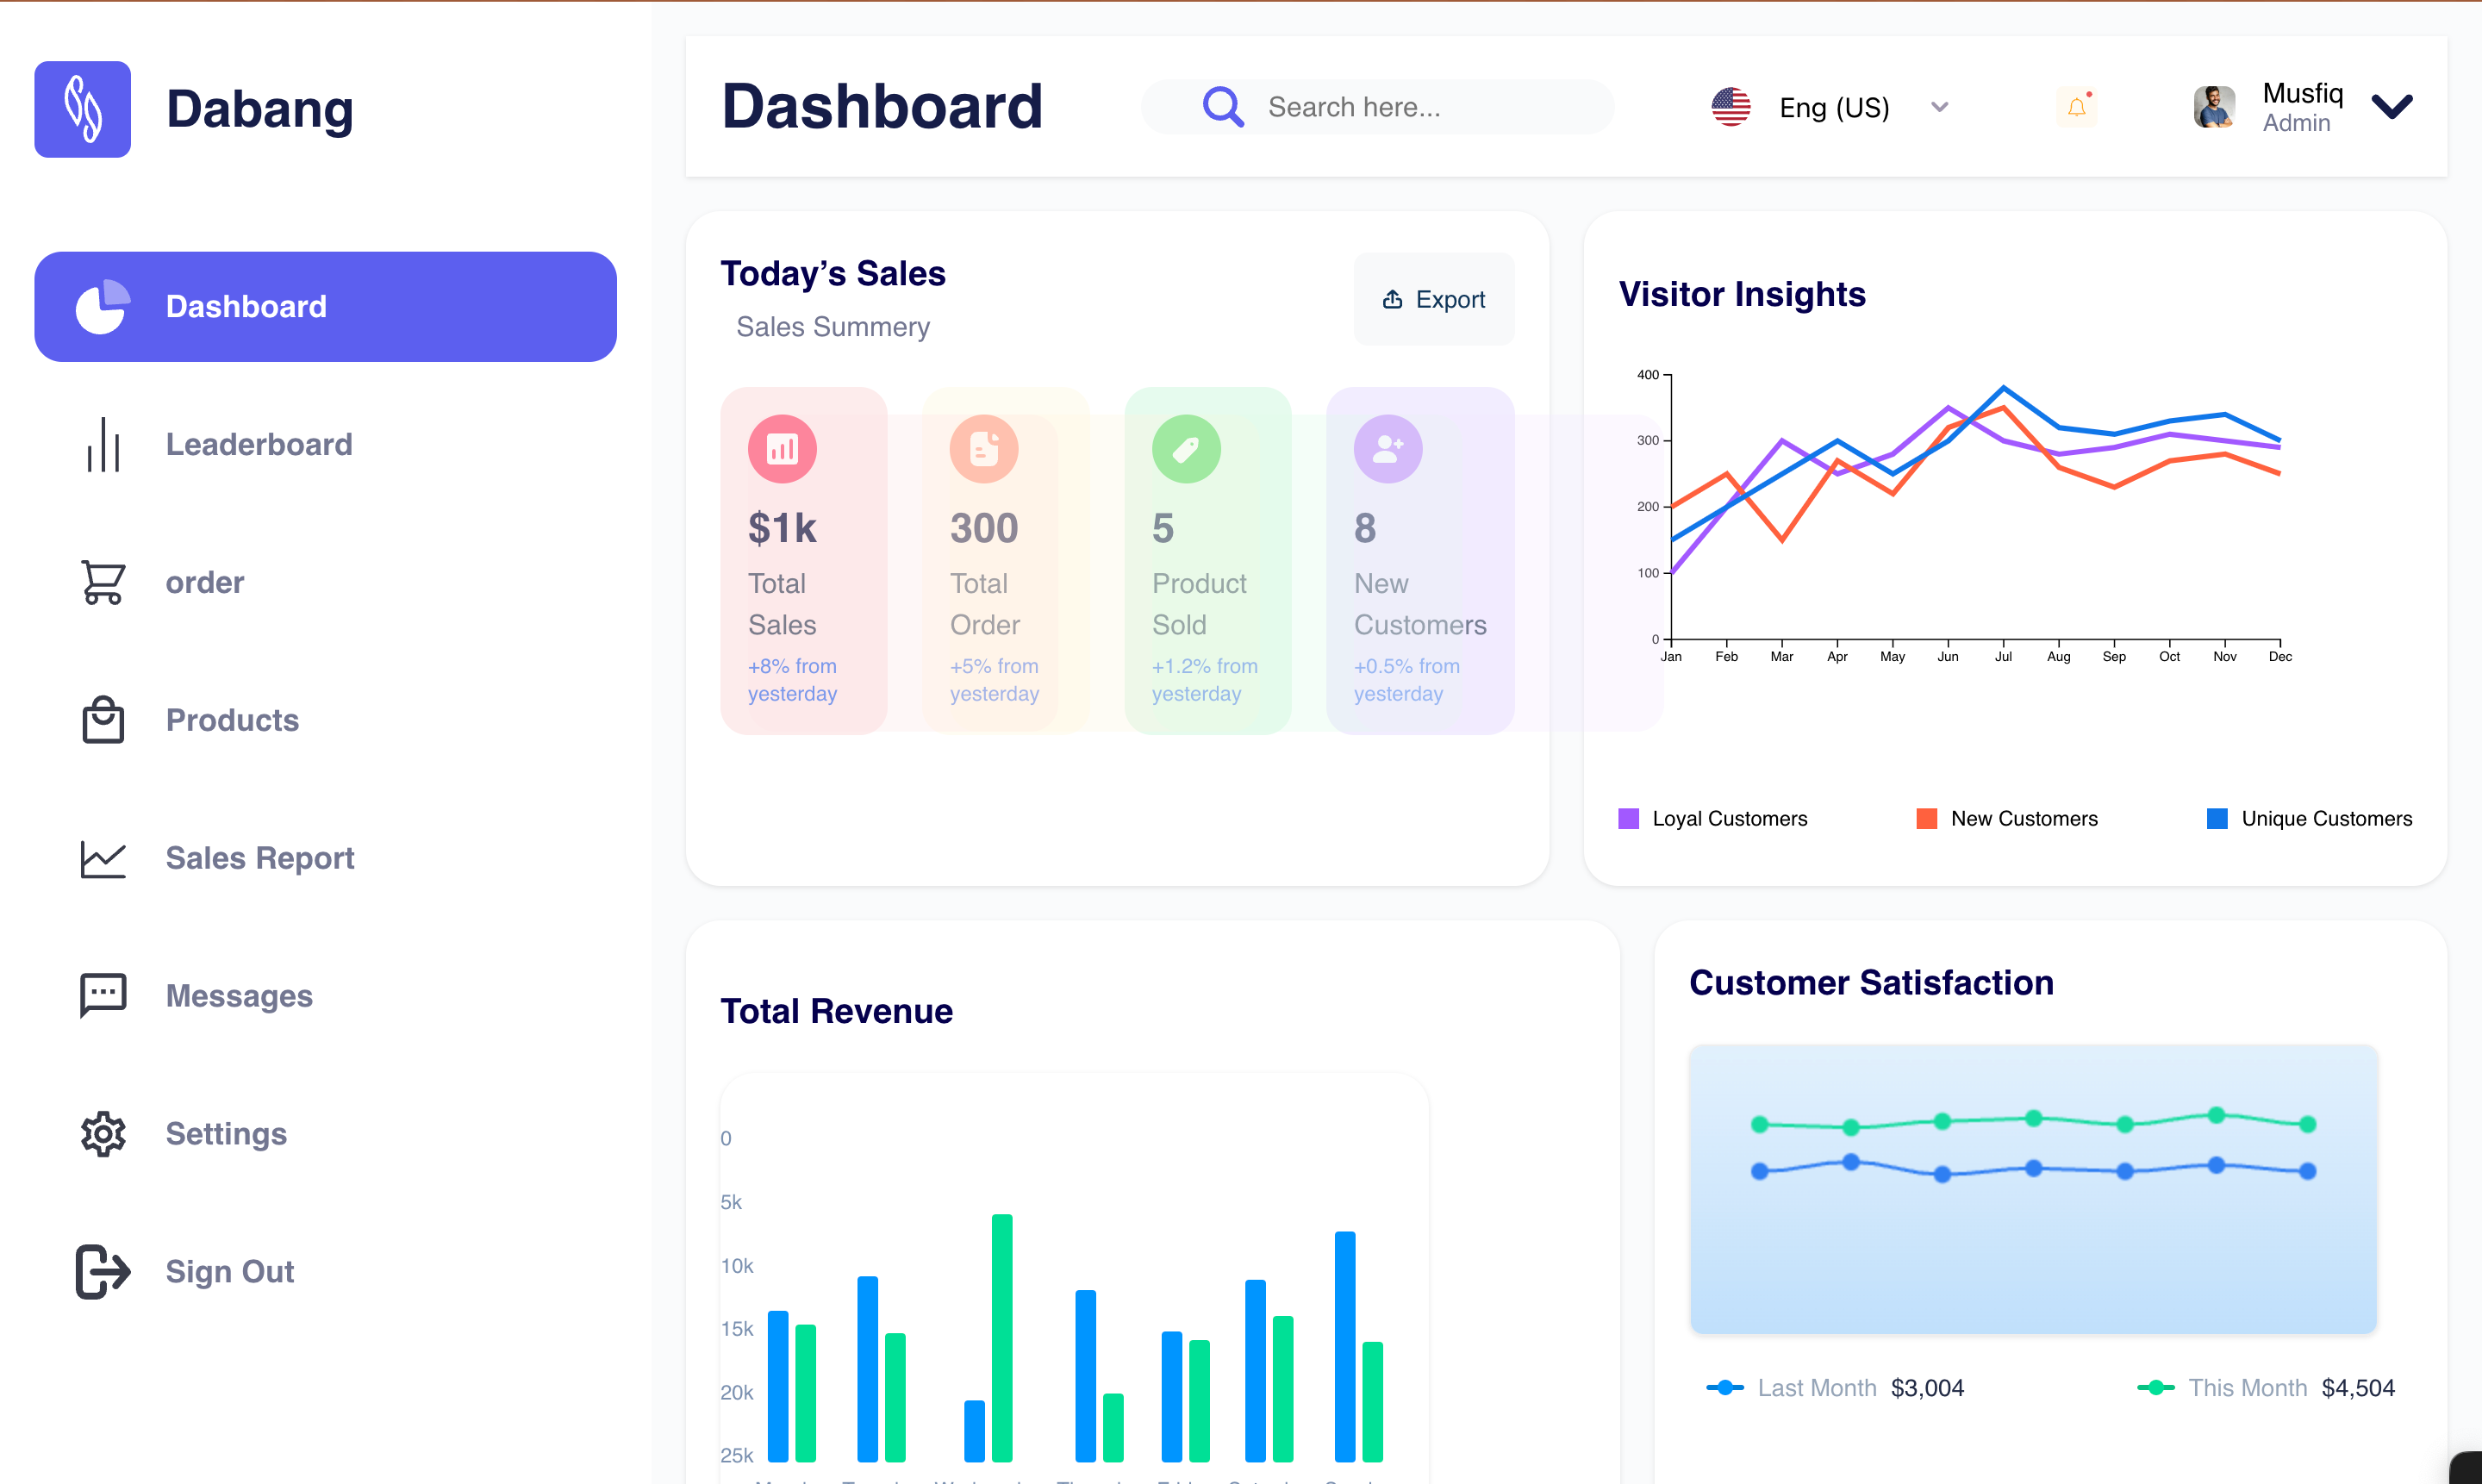
As you can see, it's almost 80% close to the design and you can further customize it as per your requirements.
Without writing a single line of code, we have created the whole dashboard component using CodeParrot. With a bit of tweaks and prompt engineering, you can create a production-ready component in minutes.
Conclusion
CodeParrot is a great tool for developers who want to save time and focus on building their applications. It helps you convert designs to production-ready code in minutes. With CodeParrot, you can create beautiful UI components in React, React Native, Flutter, Angular, Vue, and many more. It's a must-have tool for developers who work with Figma designs.
If you want to learn more about CodeParrot, you can do so by visiting the CodeParrot website. You can also check out the CodeParrot documentation for more information on how to use the extension.