How to Easily Add Translations to Your React Apps with i18next
Learn how to add translations to your React apps using i18next and enjoy a seamless multilingual experience.
Multilingual support is a crucial aspect of modern web applications. By providing translations in multiple languages, you can cater to a diverse audience and enhance user experience. React applications can benefit significantly from internationalization libraries like i18next, which simplify the process of adding translations to your app.
This also means that you can easily switch between languages without reloading the page, making your app more user-friendly and accessible. In this article, we'll explore how to add translations to your React applications using i18next and create a seamless multilingual experience for your users.
What is i18next?
i18next is a popular internationalization library for JavaScript applications. It provides a robust framework for managing translations, formatting dates, numbers, and handling pluralization. i18next supports multiple backends for storing translations, making it versatile and adaptable to various project requirements.
Getting Started with i18next in React
Let's get started by creating a new React application using Vite, a modern build tool that offers fast development and optimized production builds.
pnpm create vite@latest
Next, enter the project directory and install the necessary dependencies:
pnpm add
npm install i18next react-i18next i18next-http-backend i18next-browser-languagedetector
The i18next package is the core library, while react-i18next provides React bindings for i18next. The i18next-http-backend package allows loading translations from a remote server, and i18next-browser-languagedetector detects the user's preferred language based on the browser settings.
To start out, here's my App.jsx file:
import "./App.css";
function App() {
return (
<div className="app">
<header className="app-header">
<h1>Welcome to My Multilingual App</h1>
<p>
Learn how to add translations to your React app easily and
efficiently.
</p>
</header>
<main className="app-main">
<section className="content-section">
<h2>About This Tutorial</h2>
<p>
This tutorial will guide you through the steps needed to integrate
translations into your React application. By the end of this
tutorial, you will be able to provide a seamless multilingual
experience to your users.
</p>
</section>
<section className="content-section">
<h2>Why Add Translations?</h2>
<p>
Adding translations to your app allows you to reach a broader
audience. In today's globalized world, it's crucial to make your
content accessible to users who speak different languages.
</p>
</section>
<section className="content-section">
<h2>Getting Started</h2>
<p>
To get started with translations, we will use a popular library
called <strong>react-i18next</strong>. This library provides all the
tools you need to translate your app's content.
</p>
</section>
</main>
<footer className="app-footer">
<p>© 2024 My Multilingual App. All rights reserved.</p>
</footer>
</div>
);
}
export default App;It just has some placeholder content for now. We'll add translations to this app shortly.
Setting Up i18next
To configure i18next in your React application, create a new file called i18n.js in the src directory:
import i18next from "i18next";
import { initReactI18next } from "react-i18next";
import LanguageDetector from "i18next-browser-languagedetector";
import HTTPApi from "i18next-http-backend";

i18next
  .use(initReactI18next)
  .use(LanguageDetector)
  .use(HTTPApi)
  .init({
    fallbackLng: "en",
    interpolation: {
      escapeValue: false,
    },
  });

export default i18next;In the i18n.js file, we have several key components to set up i18next for our React application:
-
Importing i18next and its dependencies: We start by importing the core i18next library, along with its React bindings, language detector, and HTTP backend.
-
Using the React integration: initReactI18next provides the integration for using i18next with React.
-
Using the language detector: LanguageDetector helps detect the user's preferred language based on their browser settings.
-
Using the HTTP backend: HTTPApi allows loading translations from a remote server.
-
Initializing i18next: The init function configures i18next with a fallback language (English in this case) and sets interpolation options.
This setup ensures that i18next is properly configured to handle translations and detect the user's preferred language.
Loading Translations
Next, we'll create translation files for different languages. In the public directory, create a new folder called locales and add subfolders for each language you want to support, such as en for English and fr for French. Inside each language folder, create a translation.json file with the respective translations.
Here's an example of the translation.json file for English (public/locales/en/translation.json):
{
  "welcome_message": "Welcome to My Multilingual App",
  "tutorial_intro": "Learn how to add translations to your React app easily and efficiently.",
  "about_this_tutorial": "About This Tutorial",
  "about_this_tutorial_text": "This tutorial will guide you through the steps needed to integrate translations into your React application. By the end of this tutorial, you will be able to provide a seamless multilingual experience to your users.",
  "why_add_translations": "Why Add Translations?",
  "why_add_translations_text": "Adding translations to your app allows you to reach a broader audience. In today's globalized world, it's crucial to make your content accessible to users who speak different languages.",
  "getting_started": "Getting Started",
  "getting_started_text": "To get started with translations, we will use a popular library called react-i18next. This library provides all the tools you need to translate your app's content."
}And for French (public/locales/fr/translation.json):
{
  "welcome_message": "Bienvenue dans mon application multilingue",
  "tutorial_intro": "Apprenez à ajouter des traductions à votre application React facilement et efficacement.",
  "about_this_tutorial": "À propos de ce tutoriel",
  "about_this_tutorial_text": "Ce tutoriel vous guidera à travers les étapes nécessaires pour intégrer des traductions dans votre application React. À la fin de ce tutoriel, vous serez en mesure de fournir une expérience multilingue transparente à vos utilisateurs.",
  "why_add_translations": "Pourquoi ajouter des traductions?",
  "why_add_translations_text": "Ajouter des traductions à votre application vous permet de toucher un public plus large. Dans le monde globalisé d'aujourd'hui, il est crucial de rendre votre contenu accessible aux utilisateurs qui parlent différentes langues.",
  "getting_started": "Commencer",
  "getting_started_text": "Pour commencer avec les traductions, nous allons utiliser une bibliothèque populaire appelée react-i18next. Cette bibliothèque fournit tous les outils nécessaires pour traduire le contenu de votre application."
}These translation files contain key-value pairs for each translation string. We'll use these translations to display content in different languages based on the user's preference.
Using Translations in Your App
Now that we have set up i18next and loaded translations for different languages, let's integrate them into our React application
First, make sure to import and initialize i18next at the entry point of your application in main.jsx:
import React from "react";
import ReactDOM from "react-dom/client";
import App from "./App.jsx";
import "./index.css";
import "./i18n.js";

ReactDOM.createRoot(document.getElementById("root")).render(
  <React.StrictMode>
    <App />
  </React.StrictMode>
);Next, update your App.jsx file to use the useTranslation hook provided by react-i18next:
import "./App.css";
import { useTranslation } from "react-i18next";
function App() {
const { t } = useTranslation();
return (
<div className="app">
<header className="app-header">
<h1>{t("welcome_message")}</h1>
<p>{t("tutorial_intro")}</p>
</header>
<main className="app-main">
<section className="content-section">
<h2>{t("about_this_tutorial")}</h2>
<p>{t("about_this_tutorial_text")}</p>
</section>
<section className="content-section">
<h2>{t("why_add_translations")}</h2>
<p>{t("why_add_translations_text")}</p>
</section>
<section className="content-section">
<h2>{t("getting_started")}</h2>
<p>{t("getting_started_text")}</p>
</section>
</main>
<footer className="app-footer">
<p>© 2024 My Multilingual App. All rights reserved.</p>
</footer>
</div>
);
}
export default App;The useTranslation hook provides access to the t function, which we use to translate the content based on the key specified in the translation files. By calling t('key'), we can retrieve the corresponding translation string for that key.
Switching Between Languages
To enable users to switch between languages, we can add a language selector to our app. Here's an example of how you can implement a language switcher using the i18next instance:
import "./App.css";
import { useTranslation } from "react-i18next";
function App() {
const { t, i18n } = useTranslation();
const changeLanguage = (lng) => {
i18n.changeLanguage(lng);
};
return (
<div className="app">
<header className="app-header">
<h1>{t("welcome_message")}</h1>
<p>{t("tutorial_intro")}</p>
<div className="language-selector">
<button onClick={() => changeLanguage("en")}>English</button>
<button onClick={() => changeLanguage("fr")}>Français</button>
</div>
</header>
<main className="app-main">
<section className="content-section">
<h2>{t("about_this_tutorial")}</h2>
<p>{t("about_this_tutorial_text")}</p>
</section>
<section className="content-section">
<h2>{t("why_add_translations")}</h2>
<p>{t("why_add_translations_text")}</p>
</section>
<section className="content-section">
<h2>{t("getting_started")}</h2>
<p>{t("getting_started_text")}</p>
</section>
</main>
<footer className="app-footer">
<p>© 2024 My Multilingual App. All rights reserved.</p>
</footer>
</div>
);
}
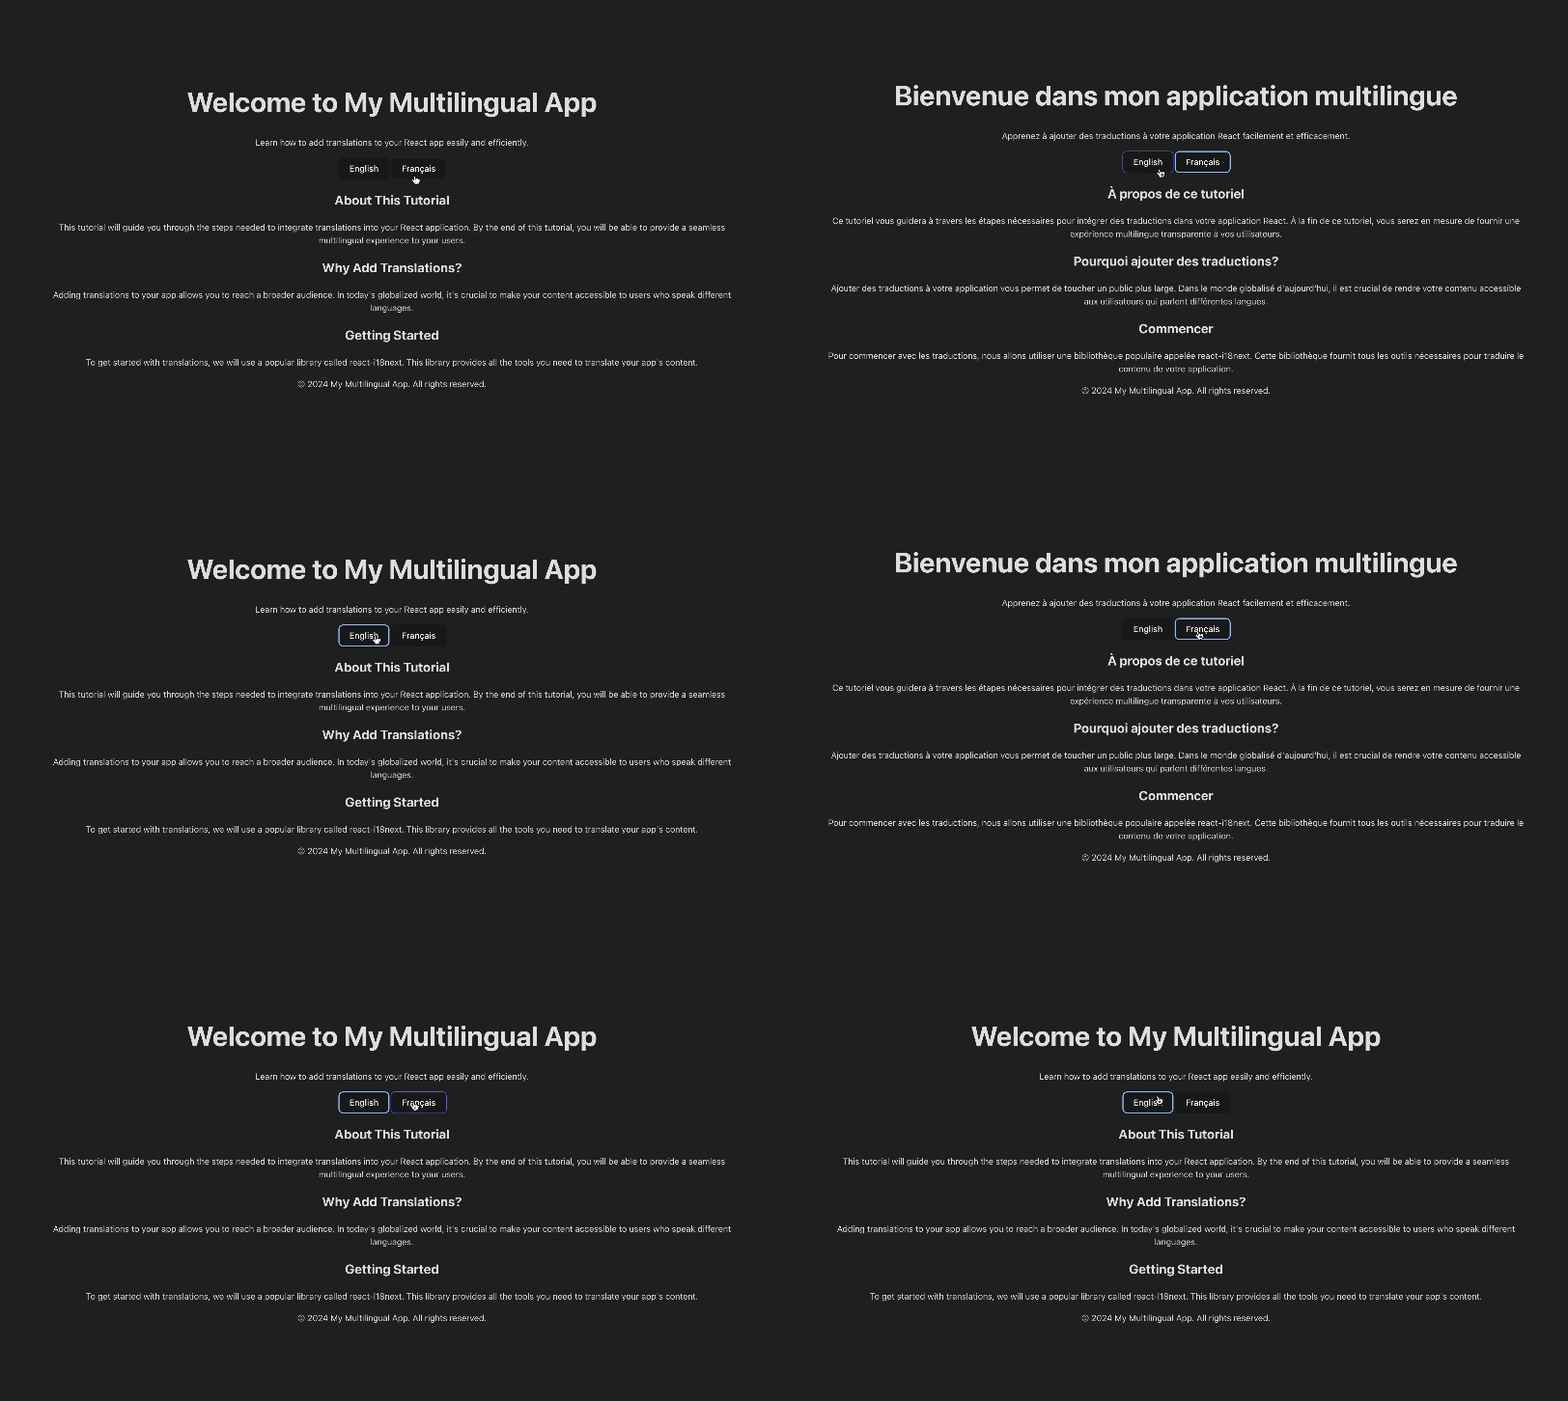
export default App;With this implementation, users can switch between English and French by clicking the respective language buttons. The changeLanguage function changes the language based on the selected locale.
If you've followed along, you should now have a React application with multilingual support using i18next. Here is a preview of the app in English and French:

Fall Back to Default Language
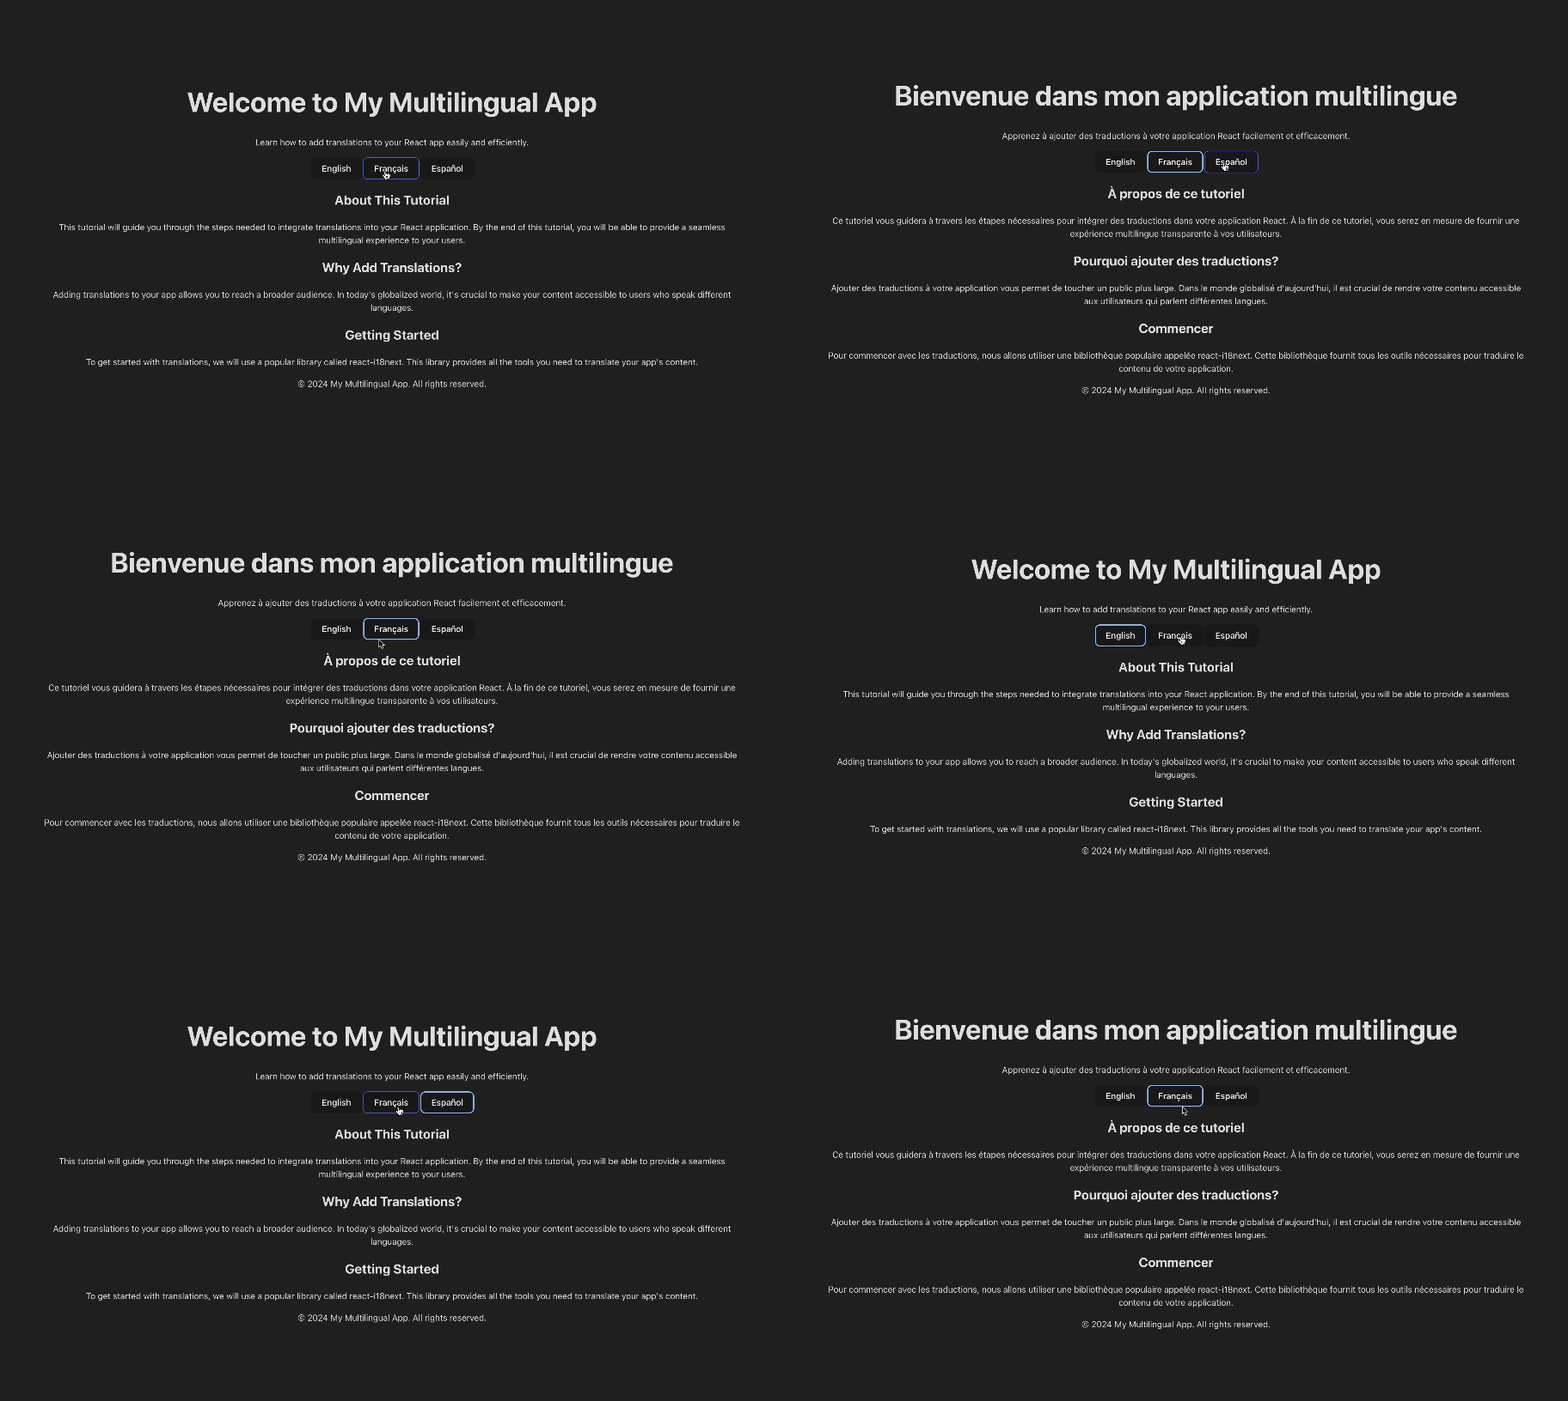
In the event that a translation is missing for a specific key, i18next will fall back to the default language specified in the configuration. This ensures that users always see content, even if translations are missing for a particular language.
For example, let's add a button for a language that doesn't have translations in our app:
<div className="language-selector">
  <button onClick={() => changeLanguage("en")}>English</button>
  <button onClick={() => changeLanguage("fr")}>Français</button>
  <button onClick={() => changeLanguage("es")}>Español</button>
</div>Since we haven't provided translations for Spanish, i18next will fall back to the default language (English) when the user selects Spanish.

By adding translations to your React applications, you can provide a seamless multilingual experience to users around the world. i18next simplifies the process of managing translations and ensures that your app is accessible to a diverse audience.
I hope this tutorial has been helpful in guiding you through the process of adding translations to your React apps. Happy coding!